
[2023 Version] Create working calendar
Main content:
A. Create a working calendar configuration (Details)
B. Add employees to the working calendar (Details)
C. Create a specific monthly working calendar (Details)
1. Approval deadline change (Details)
To enable employees to clock in, a work schedule must first be created for them.
terra system allows multiple work schedules creation to accommodate the diverse working hours of different employee groups.
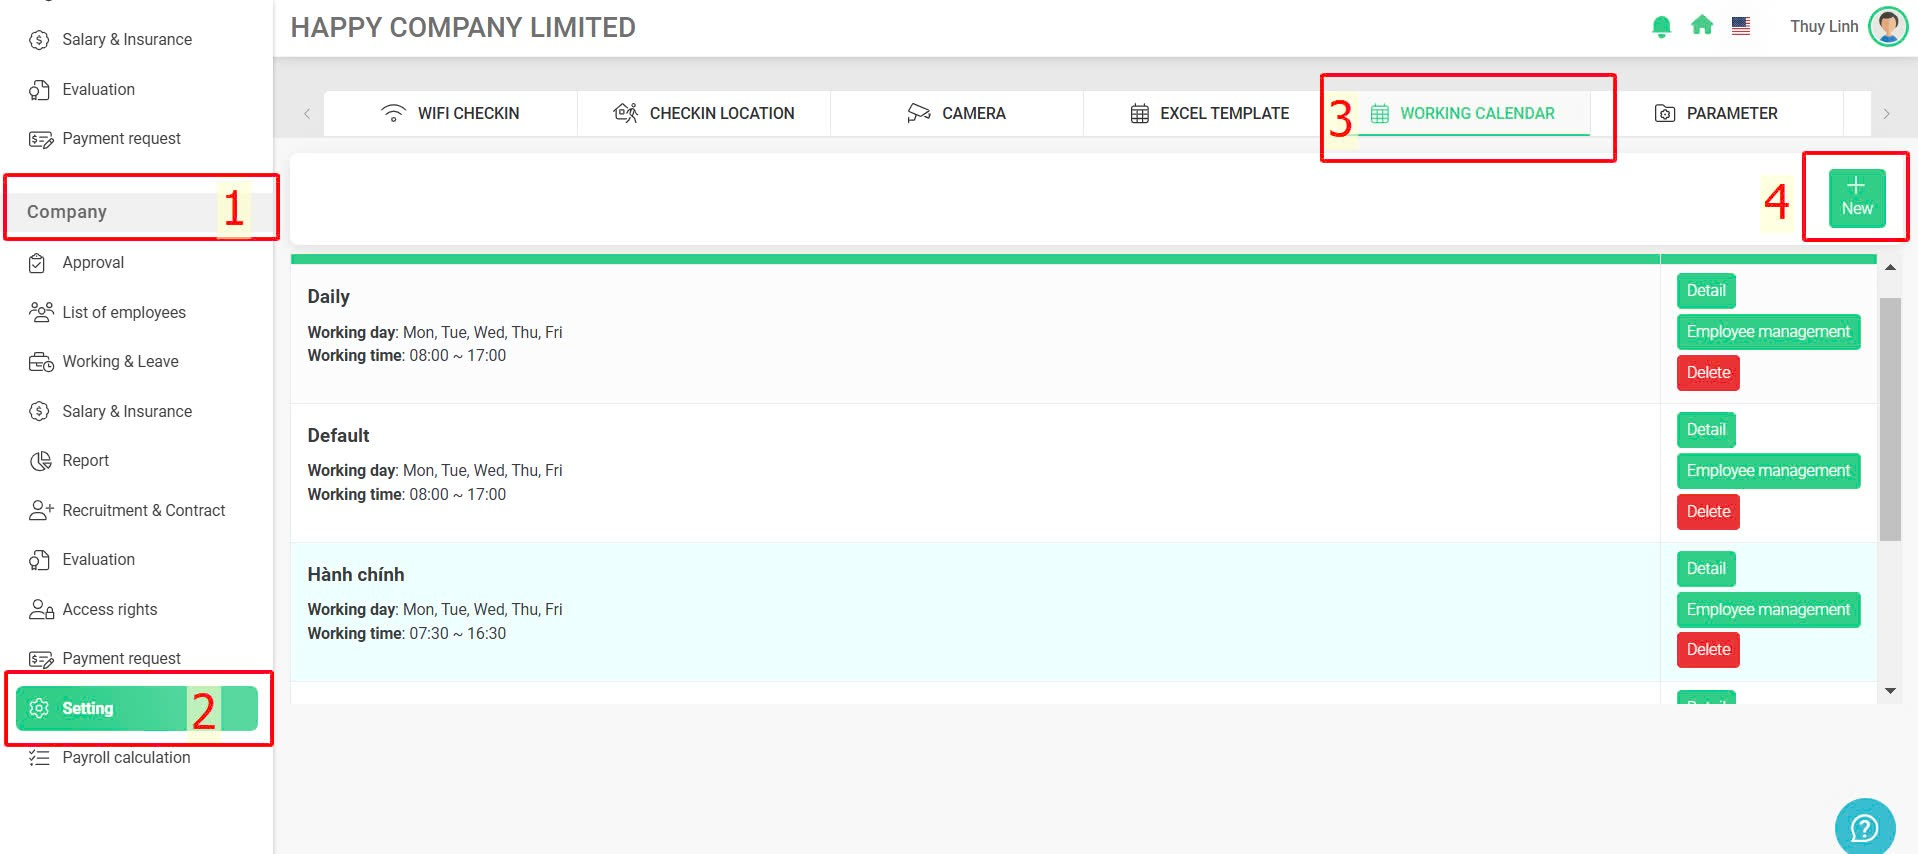
A. CREATE A WORKING CALENDAR CONFIGURATION
- Before creating a work calendar, the work calendar configuration must be set up first.
- To set up a work calendar configuration, follow these steps:
Steps:
Company > Setting > Working calendar > New > Enter necessary parameters > Save and close
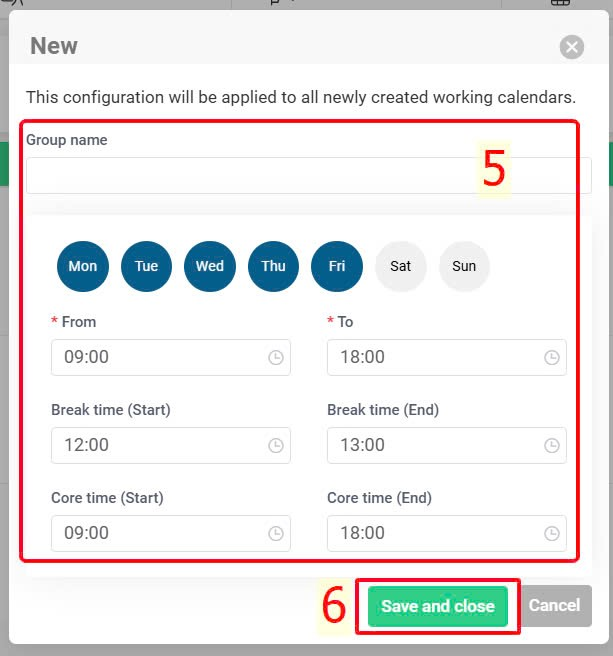
Annotation:
Glossary |
Explanation |
|
|
Name of the work schedule to be created |
|
|
Select the working days in the week, the selected days will be displayed in dark blue. |
|
|
Start working time in a day |
|
|
End working time in a day |
|
|
Lunch break start time |
|
|
Lunch break end time |
|
|
The latest time that employees are required to check in at the company (only applicable when the Core time or Flexible time clocking mode has been set up). |
|
|
The earliest time that employees can check out
|


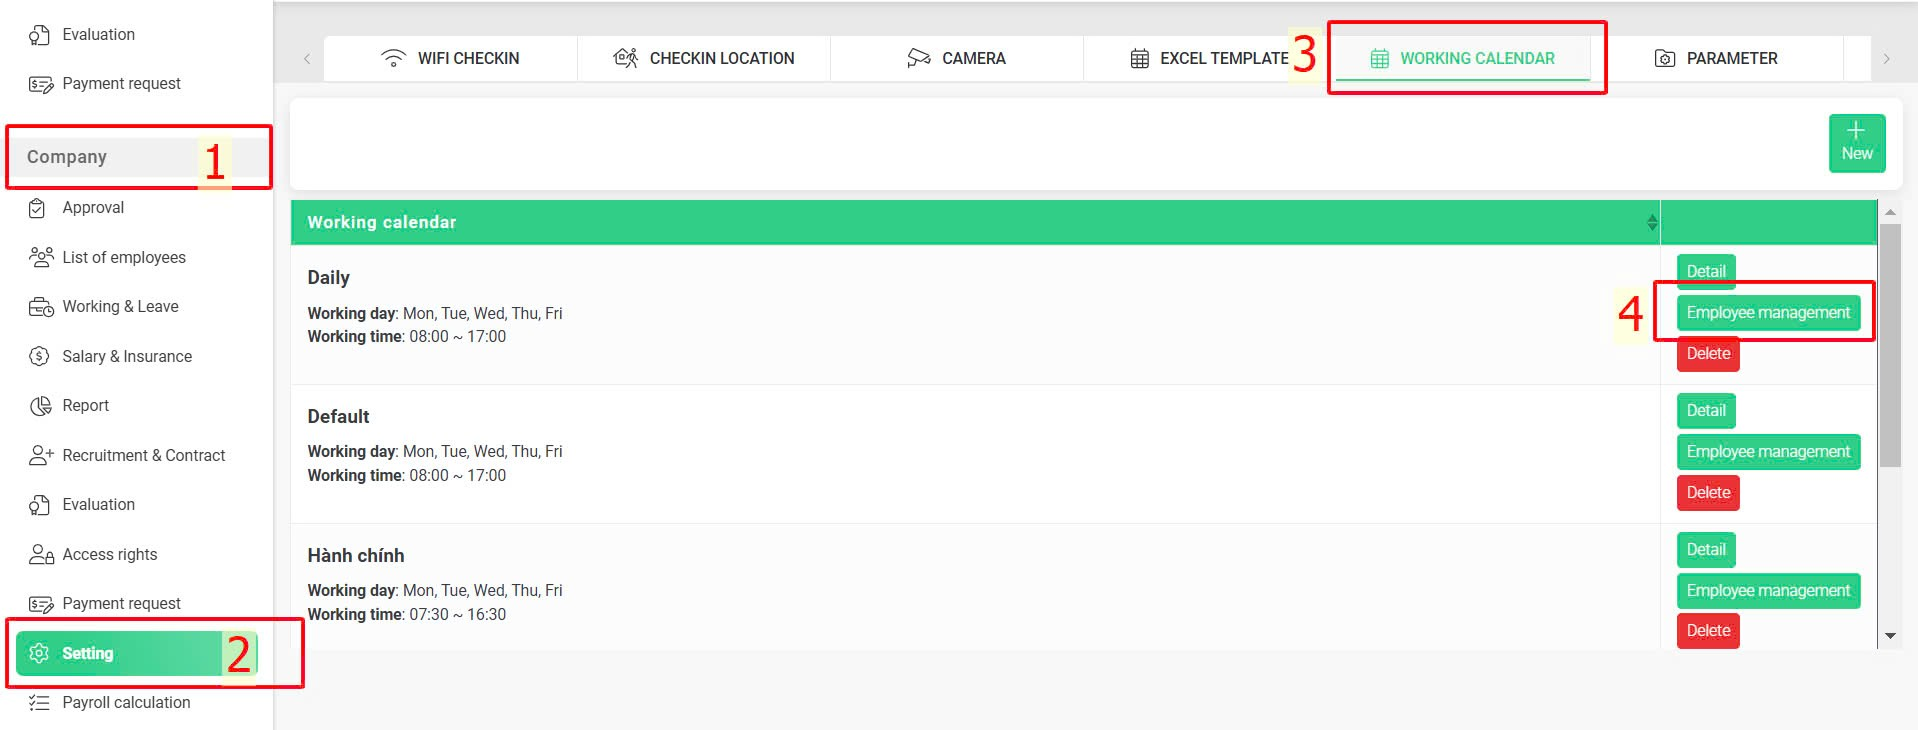
B. ADD EMPLOYEES TO THE WORKING CALENDAR
After setting up the working calendar configuration, the authorized accounts or admin can add one or more employees to the working calendar by following these steps:
Steps:
Company > Setting > Working calendar > Select the working calendar you want to add employees > Employee management > Not in this group > Use filter to find employees > Select employees > Move group
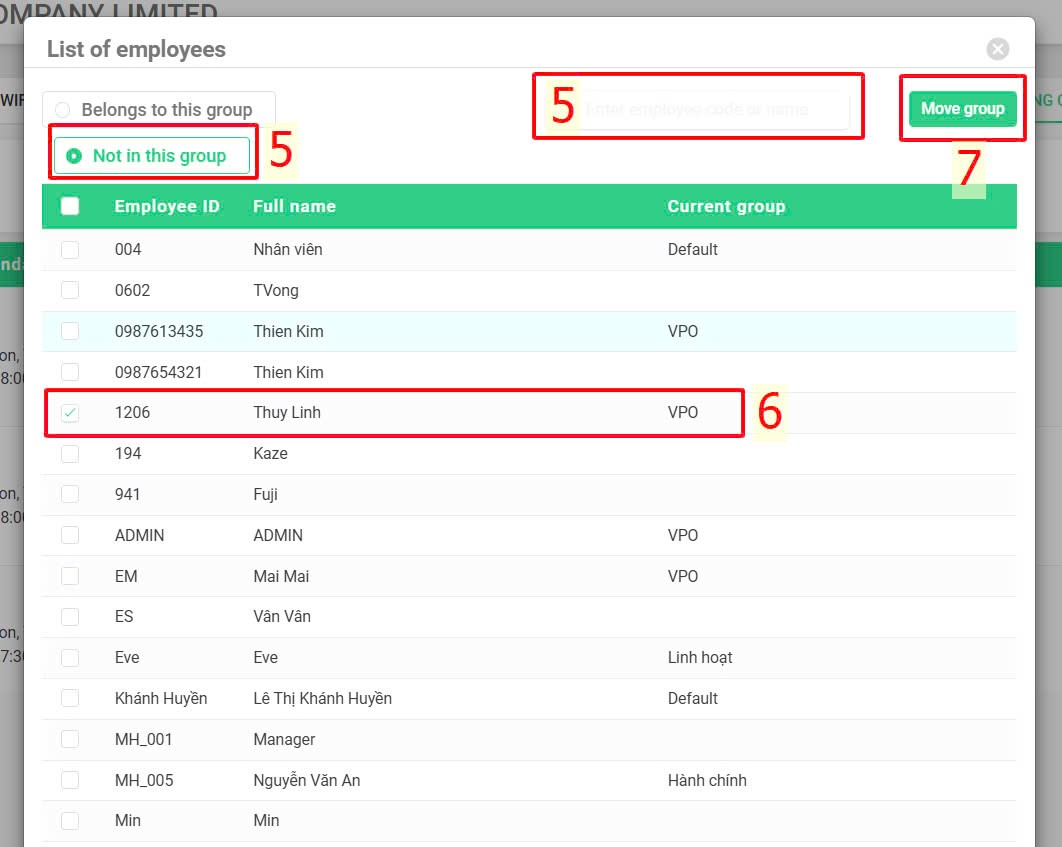
NOTE
- Each employee can only belong to one working calendar
- If the employee has not been transferred to a new work calendar group, that employee will be placed in the default work calendar (Default).
C. CREATE A SPECIFIC MONTHLY WORKING CALENDAR
- After setting up the working calendar configuration and adding employees to the work calendar, you need to create a work calendar for each month.
Steps:
Company > Setting > Working calendar > Select the work calendar needing monthly working calendar creation > Detail > New > Enter necessary parameters > Initialize calendar > Initialize calendar for each working month
Step details:
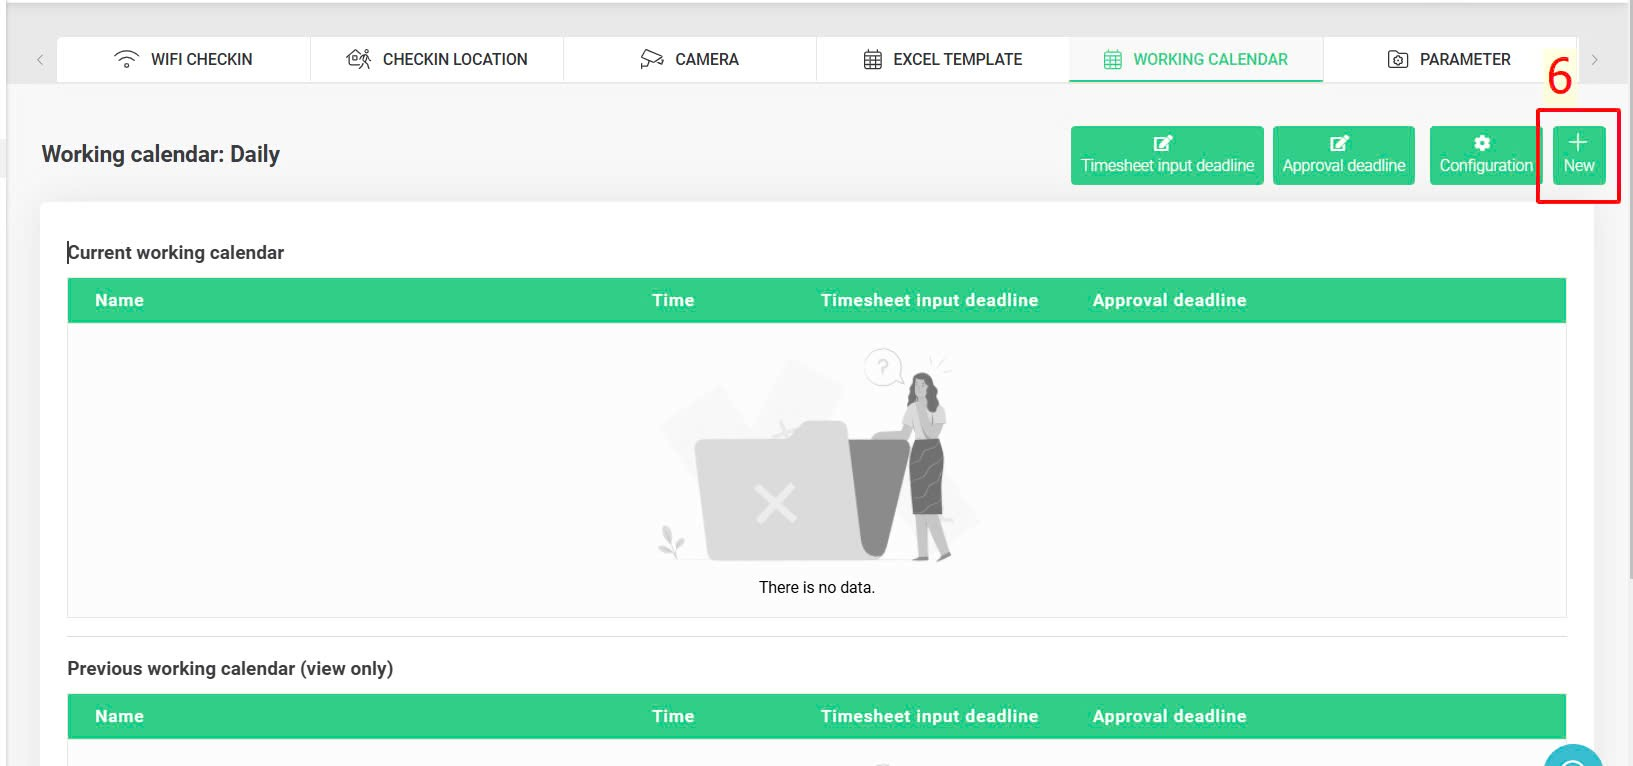
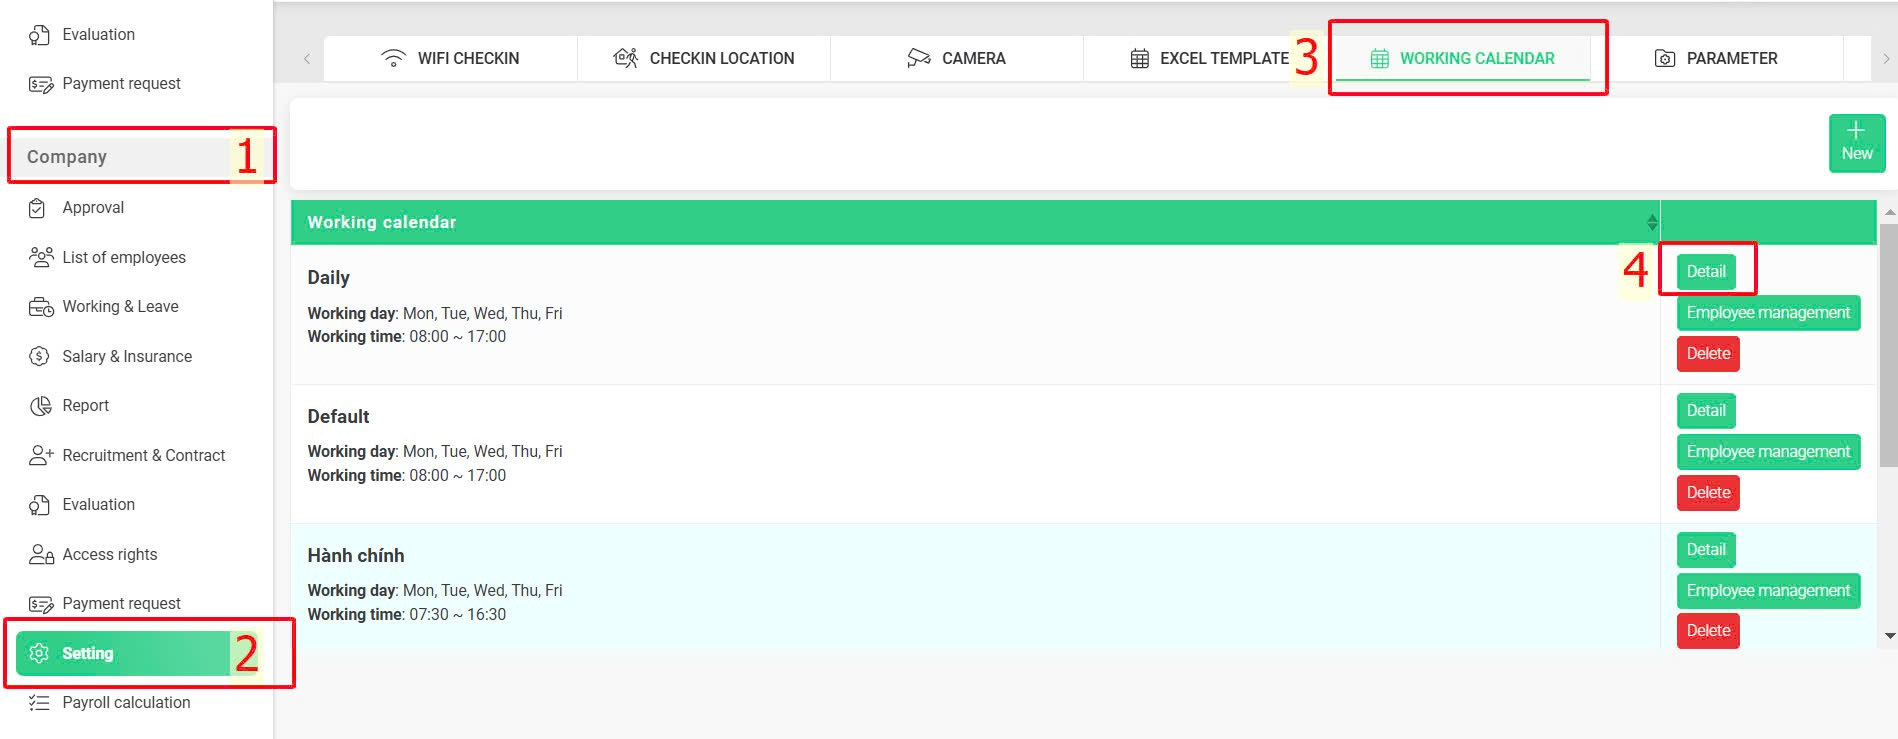
Step 1: Access the [Working calendar] screen
Company > Setting > Working calendar
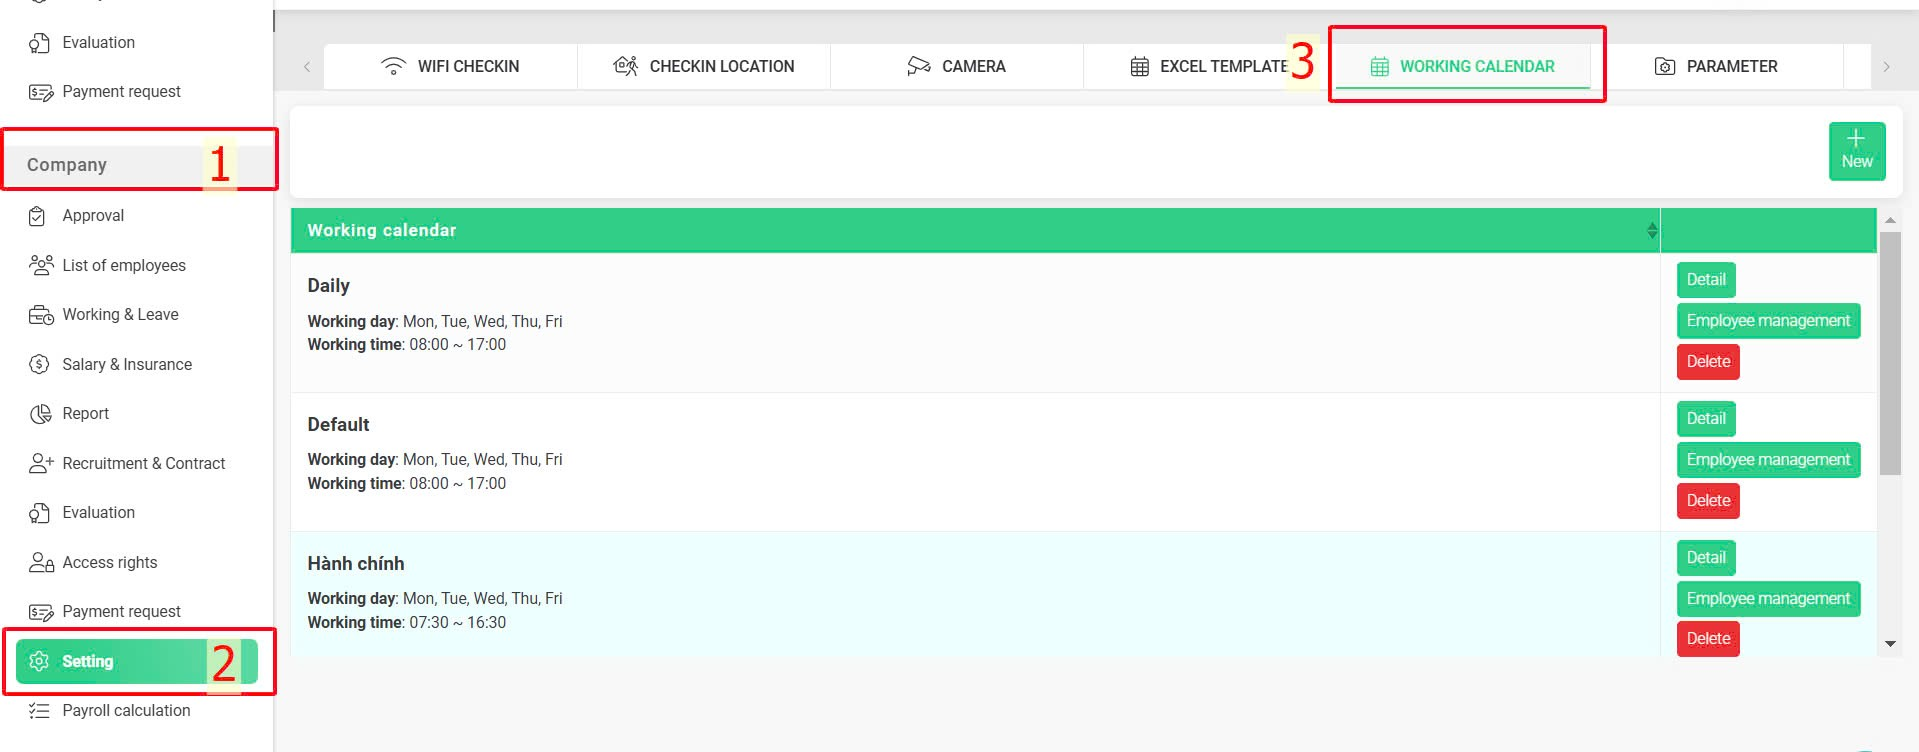
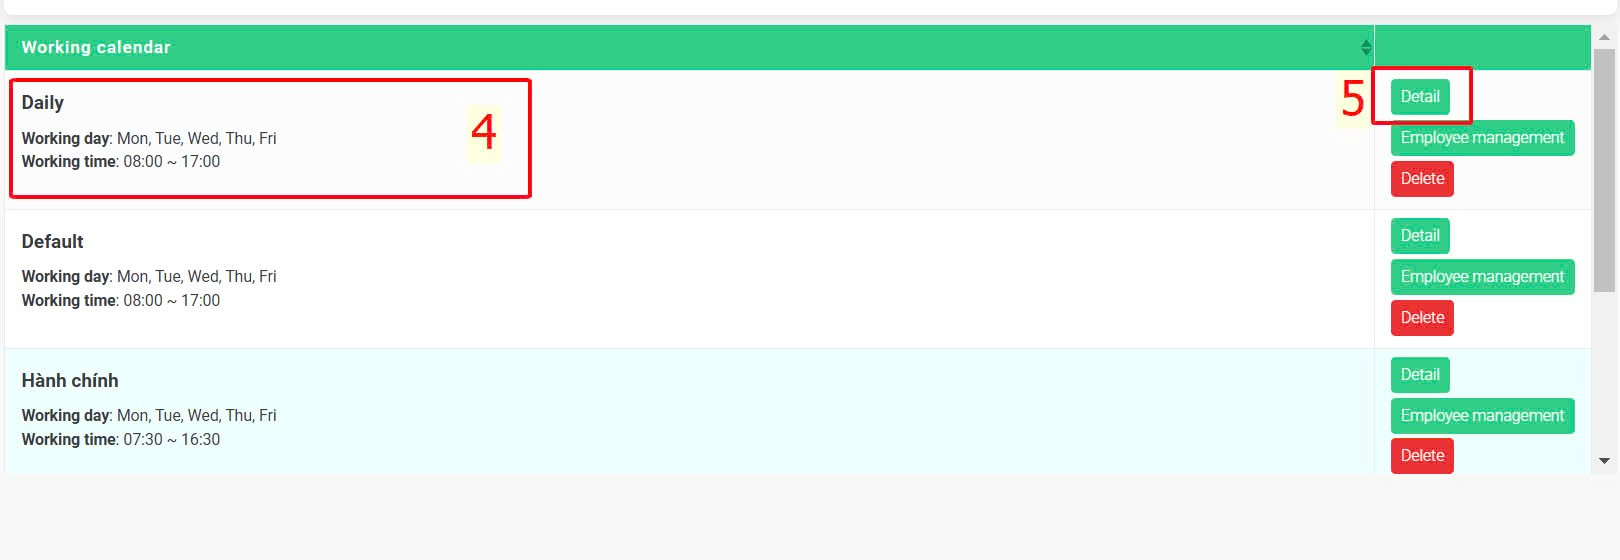
Step 2: Create the work calendar for each month
Select the work calendar needing monthly working calendar creation > Detail > New
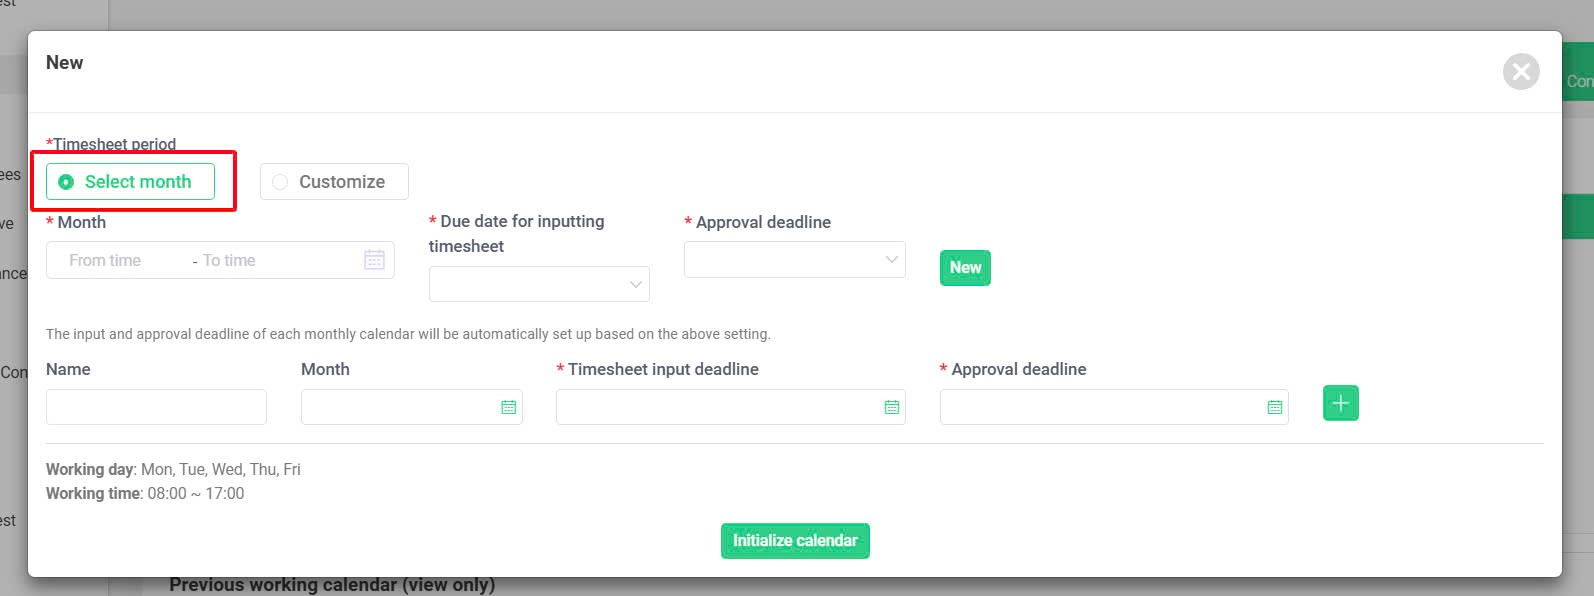
Step 3: At the screen [New]
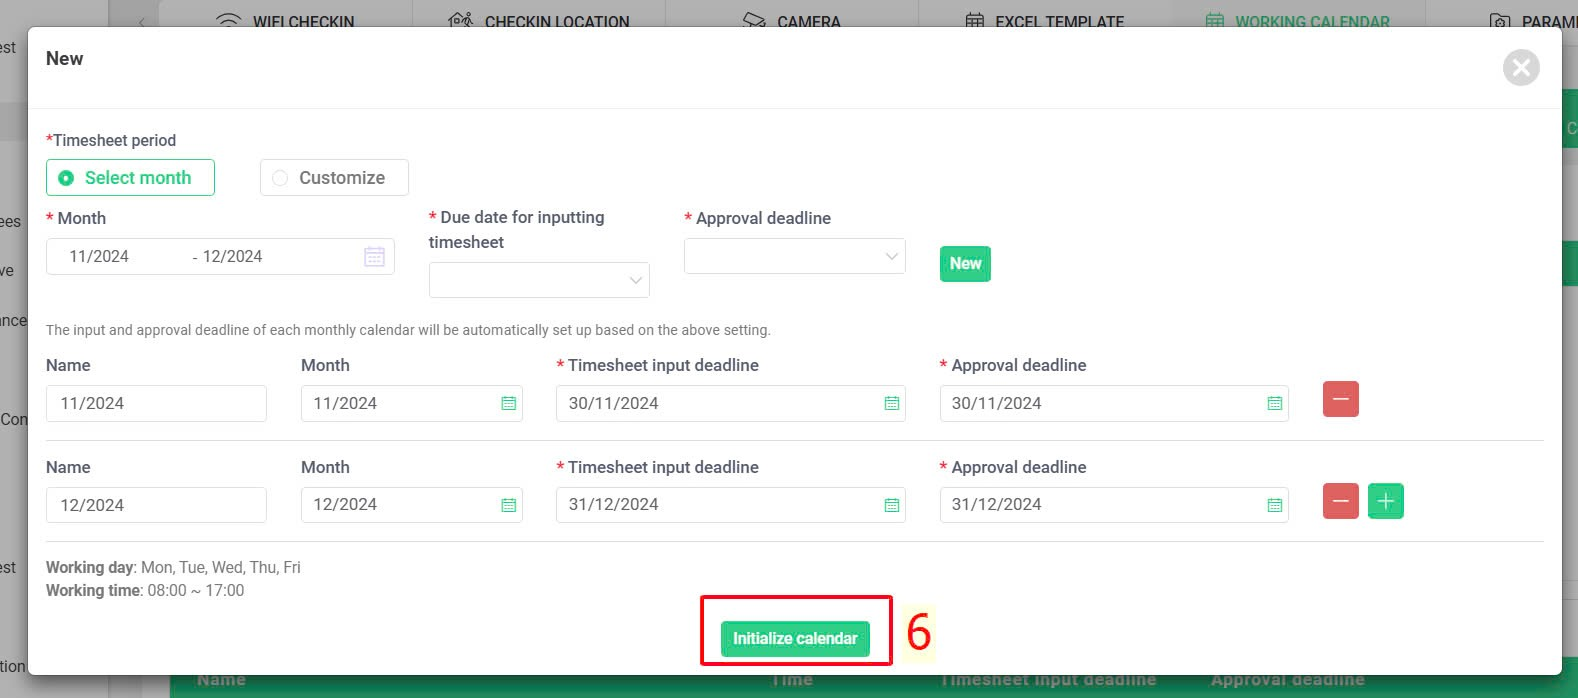
In the [Timesheet period] field, if apply [Select month], the interface will display as follows:
Annotation
Glossary |
Explanation |
|
|
The data recording period for attendance in the month starts from the first to the last day of the month. |
|
|
Select the months you want to create the work calendar |
|
|
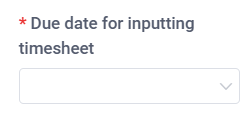
- The last day employees can adjust the attendance sheet (only applicable for companies using the manual way of inputting attendance data)- This field in the system is always automatically set to the last day of the month- If you select a date earlier than the end date of the month from the droplist, the system will interpret the due date for inputting timesheet as that date in the following month. |
|
|
- The last day for employees to create and for approver to approve requests relating to the timesheet of that month- After this date, the request creation and approval will be locked down to allow HR to finalize data for payroll calculation.- This field in the system is always automatically set to the last day of the month- If you select a date earlier than the end date of the month from the droplist, the system will interpret the due date for inputting timesheet as that date in the following month. |
|
|
After clicking, the system will generate the calendar for the selected months |


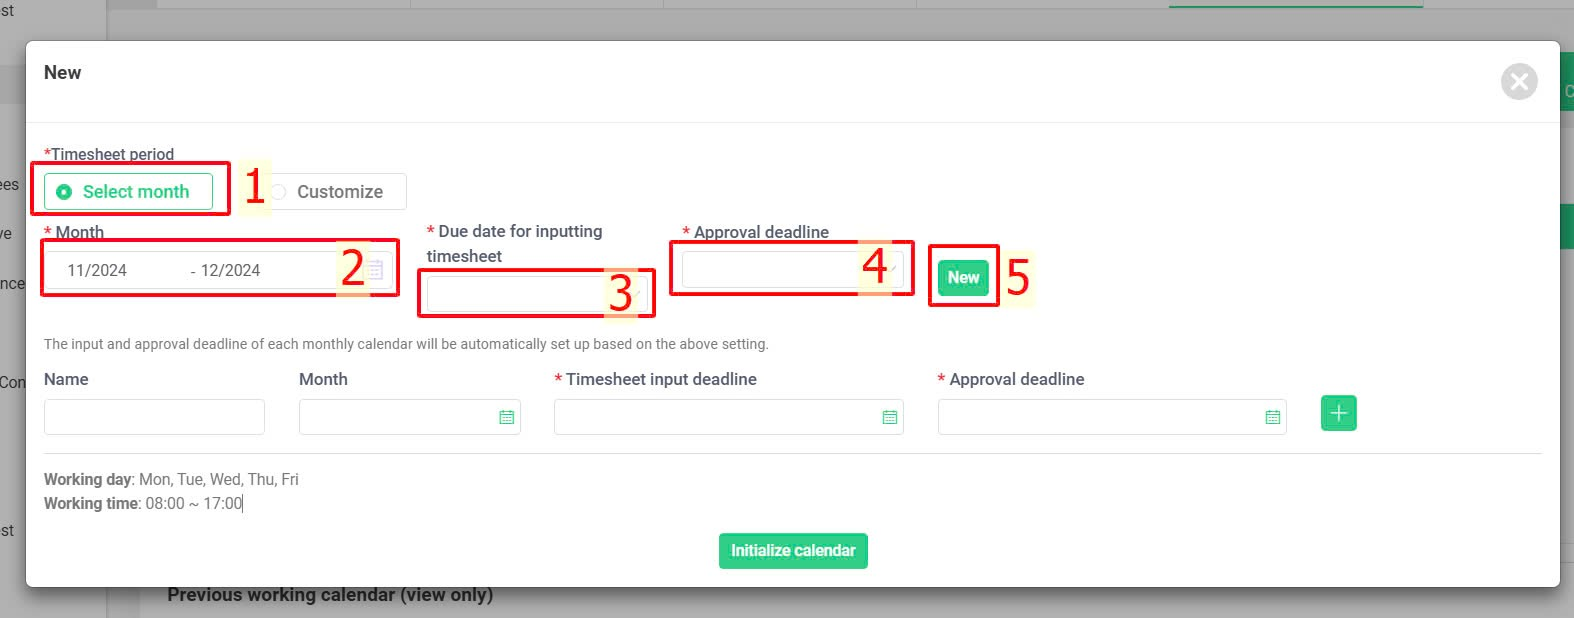
Continue setting up in the following steps:
Select month > Month > Due date for inputting timesheet (if any) > Approval deadline > New > Initialize calendar

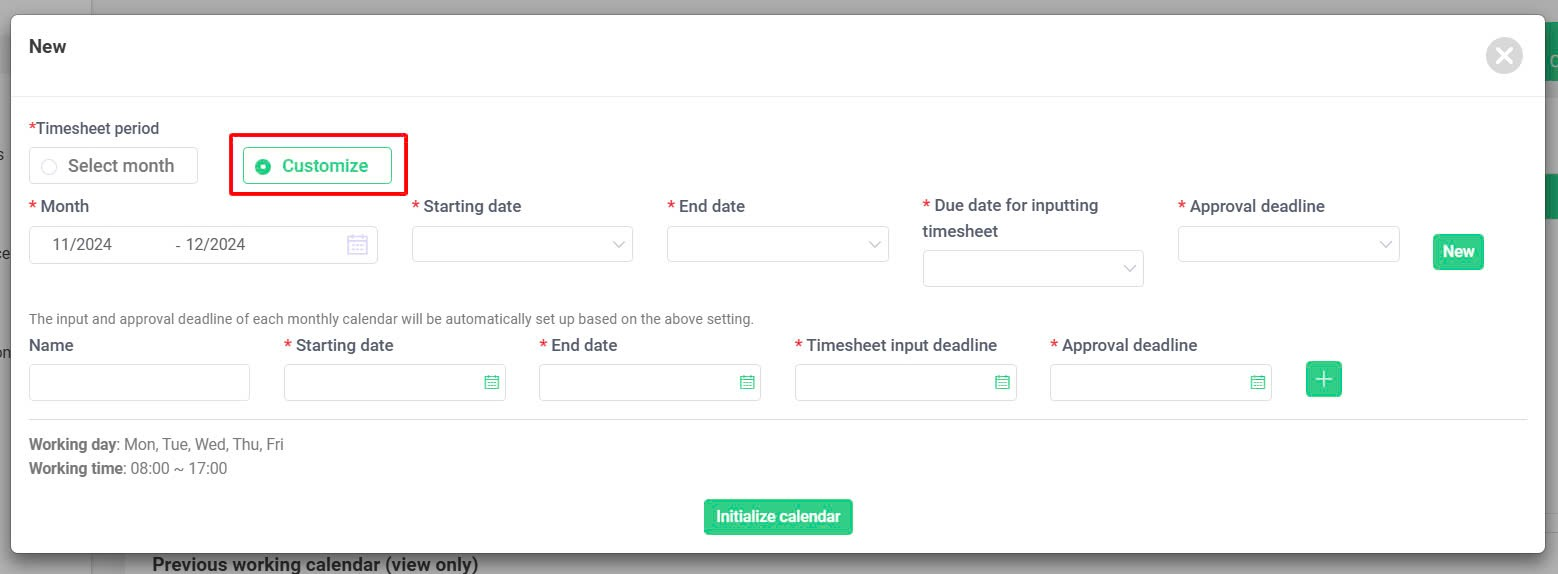
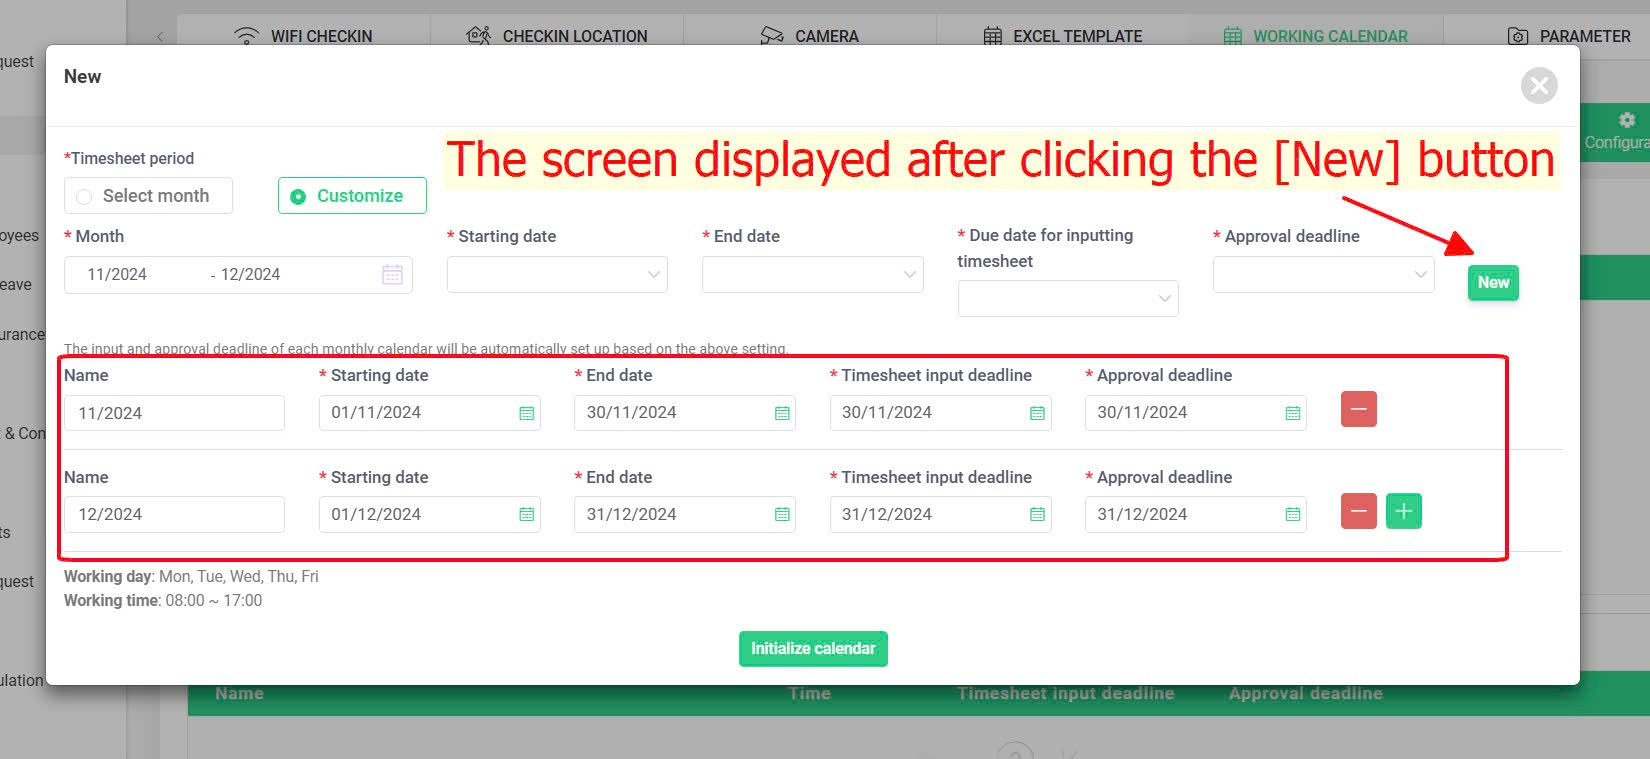
At the [Timesheet period] field, if you select [Customize], the interface will display like this:
Annotation
Glossary |
Explanation |
Timesheet period
|
The data recording time for companies with a cross-month work calendar |
|
|
Select the months you want to create the work calendar |
|
|
- The first date of the timesheet period- This field in the system is always automatically set to the first day of the month.- If you select any day from the droplist, the system will interpret it as a day in the previous month. |
|
|
- The last date of the timesheet period- This field in the system is always automatically set to the last day of the month- If you select any day from the droplist, the system will interpret it as a day in the current month. |
- The last day employees can adjust the attendance sheet (only applicable for companies using the manual way of inputting attendance data)- This field in the system is always automatically set to the last day of the month- If a date earlier than the [End date] is selected from the droplist, the system will understand that the due date for inputting timesheet is in the following month.- If a date later than the [End date] is selected from the droplist, the system will assume it's a day in the current month. |
|
 |
- The last day for employees to create and for approver to approve requests relating to timesheet of that month- After this date, the request creation and approval will be locked down to allow HR to finalize data for payroll calculations.- This field in the system is always automatically set to the last day of the month.- If you select a date earlier than the [End date] of the month from the droplist, the system will interpret it's a day in the following month.- If you select a date later than the [End date] of the month from the droplist, the system will interpret it's a day within the month |
After clicking, the system will generate the calendar for the selected months |


Continue setting up in the following steps:
Customize > Month > Starting date > End date > Due date for inputting timesheet (if any) > Approval deadline > New > Initialize calendar

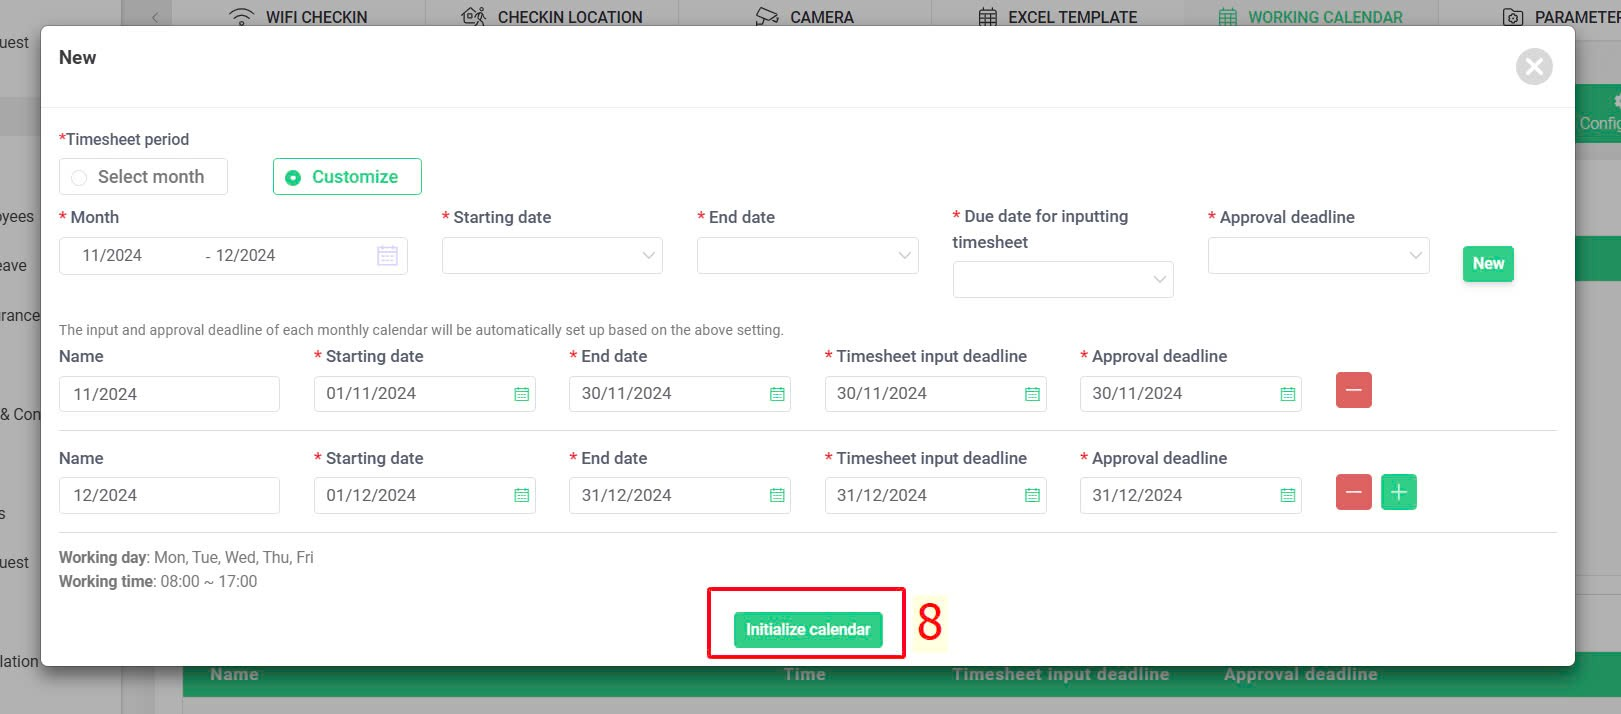
After clicking [Initialize calendar] on the [New] screen, the [Work calendar] screen will display like this:
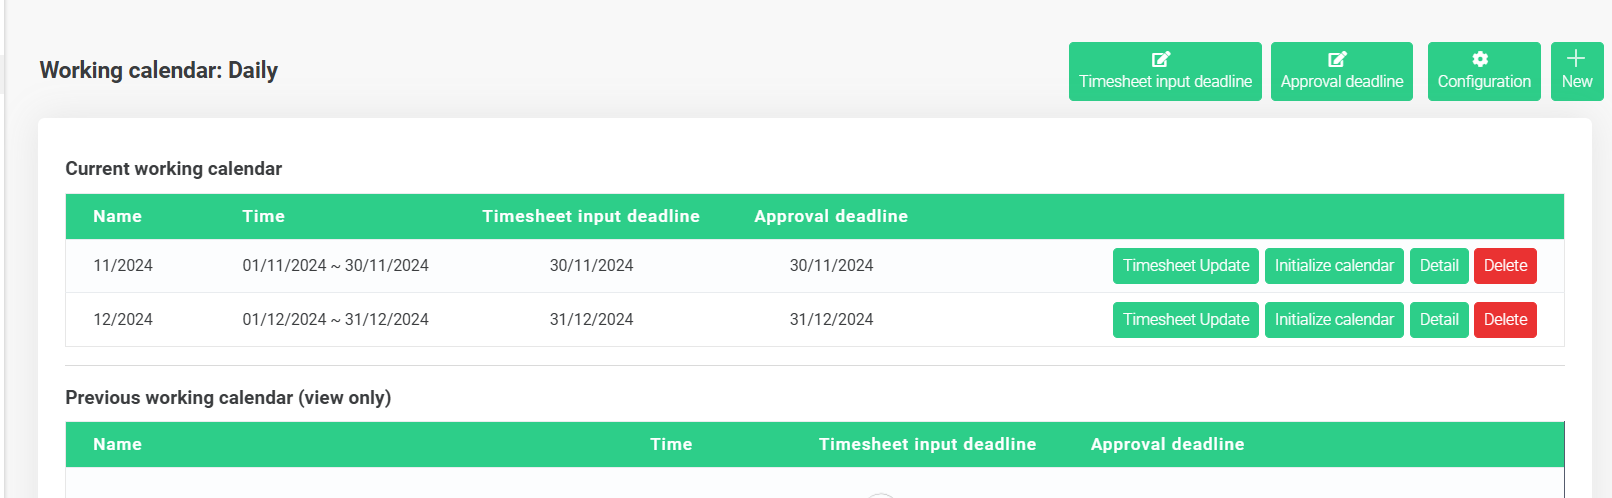
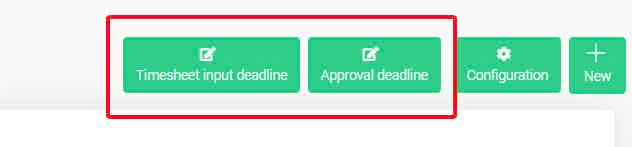
The meanings of the buttons on the [Working calendar] screen:
Glossary |
Explanation |
|
|
Adjust the deadline for submitting work hours for each month's schedule (only applicable for companies using the manual way of inputting attendance data) |
|
|
Adjust the deadline for employees to create and approve requests for that month |
|
|
- Adjust the initial work calendar configuration settings.- If you need to adjust the work calendar configuration, you must delete the created months in the work calendar and create new months to apply the new configuration. |
|
|
Create a work schedule for each month. |
|
|
When you click this button, the system will review and recalculate all attendance information and employee's requests to update the latest payroll data. |
|
|
Click this button to add employees to the work calendar of the created months. |
|
|
- View the work calendar by day- Adjust the working hours/lunch break and days off for the week |
|
|
Delete the work schedule of the month created. |


Step 4: On the [Work calendar] screen, click [Initialize calendar] for each working month.
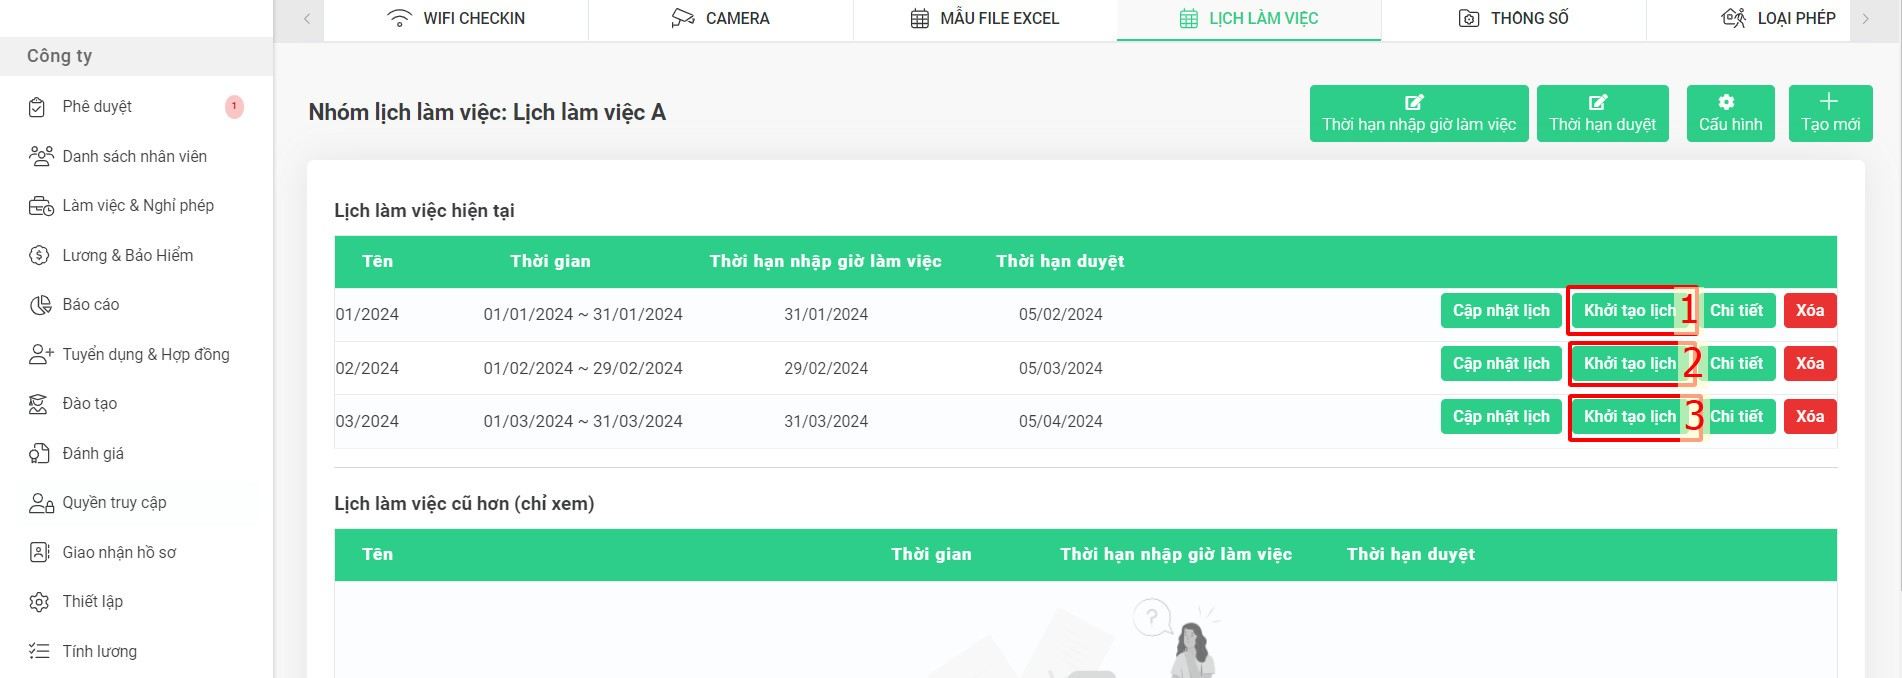
NOTE
- Each time an employee is added to the work calendar, you must click [Initialize calendar] for each working month; only then will the system record that the employee has been added to the work calendar.
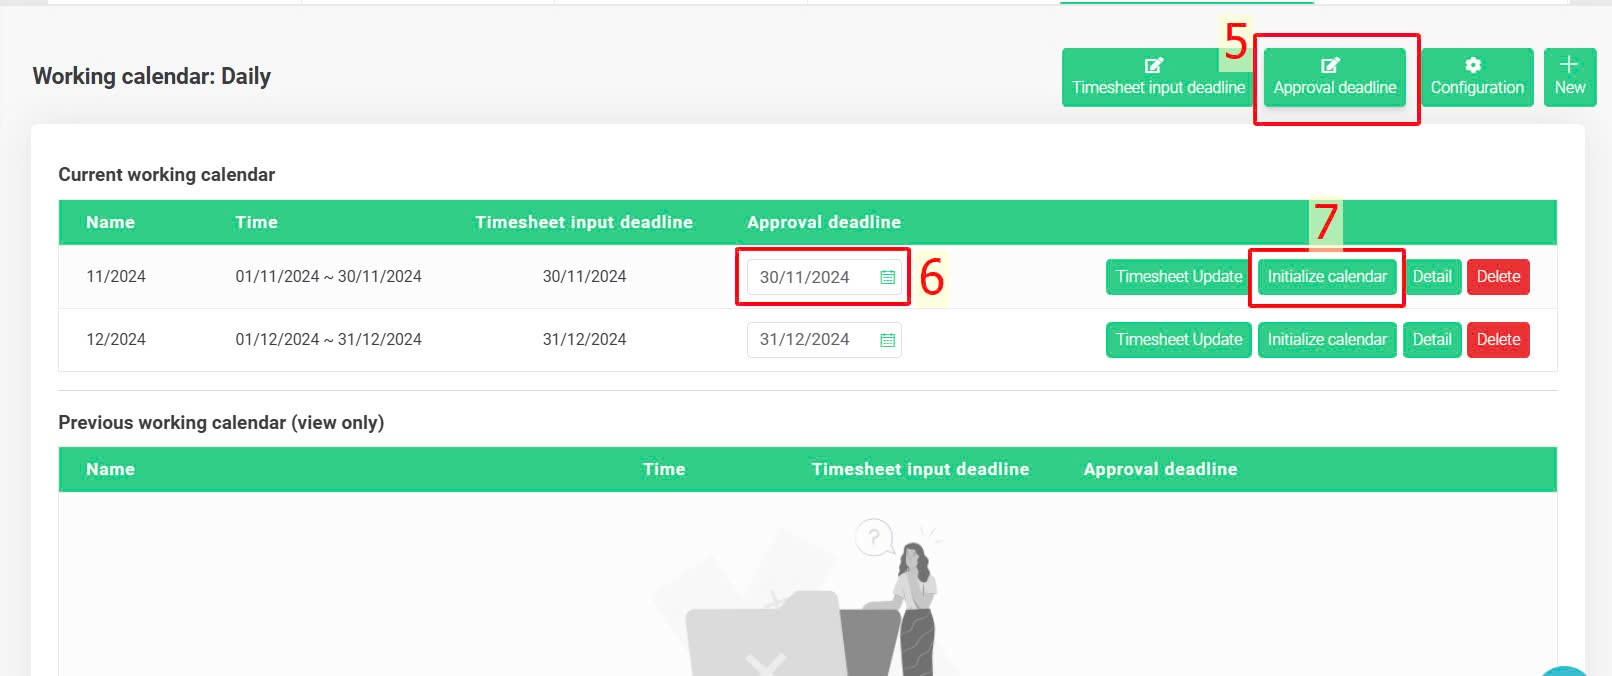
- Approval deadline change (In case the approval deadline had passed but there were still pending requests, authorized accounts can change the approval deadline of that month to proceed the request approval):
Company > Setting > Working calendar > Choose the working calendar group requiring a change in approval deadline > Detail > Approval deadline > Change the approval deadline of the requiring month > Initialize calendar
NOTE:
- For clients using only the payroll service, the Working calendar configuration screen will not display the two features: Timesheet input deadline and Approval deadline

Workin calendar configuration screen for clients using payroll service