[2023 Version] Manage leave application and export leave report
Main contents:
A. Manage leave information (more details)
B. Export leave report (more details)
A. Manage leave information
Managers can keep track of employees’ leave information by following these steps:
Steps
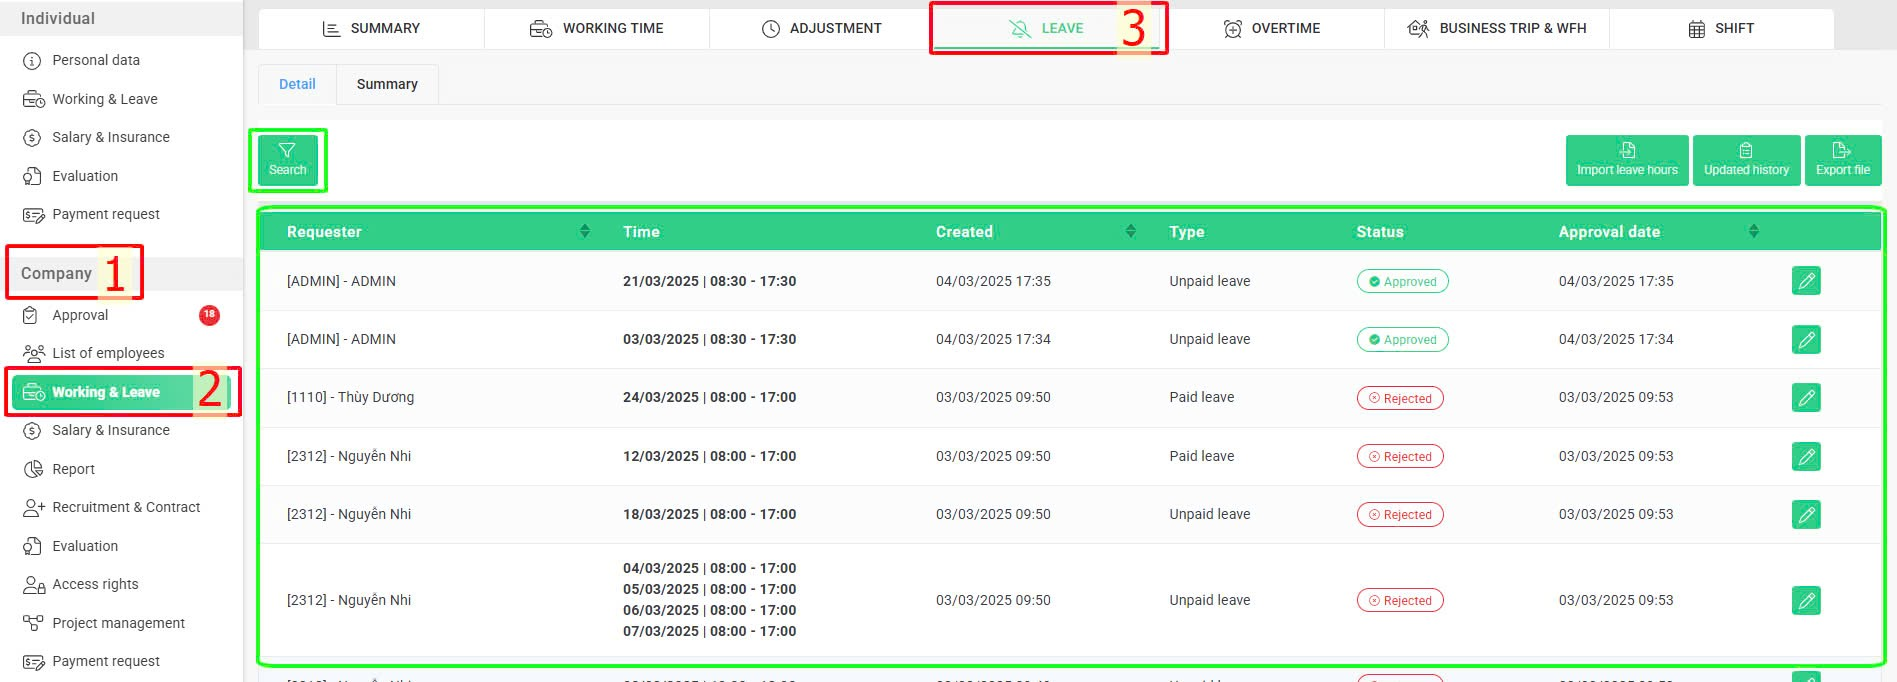
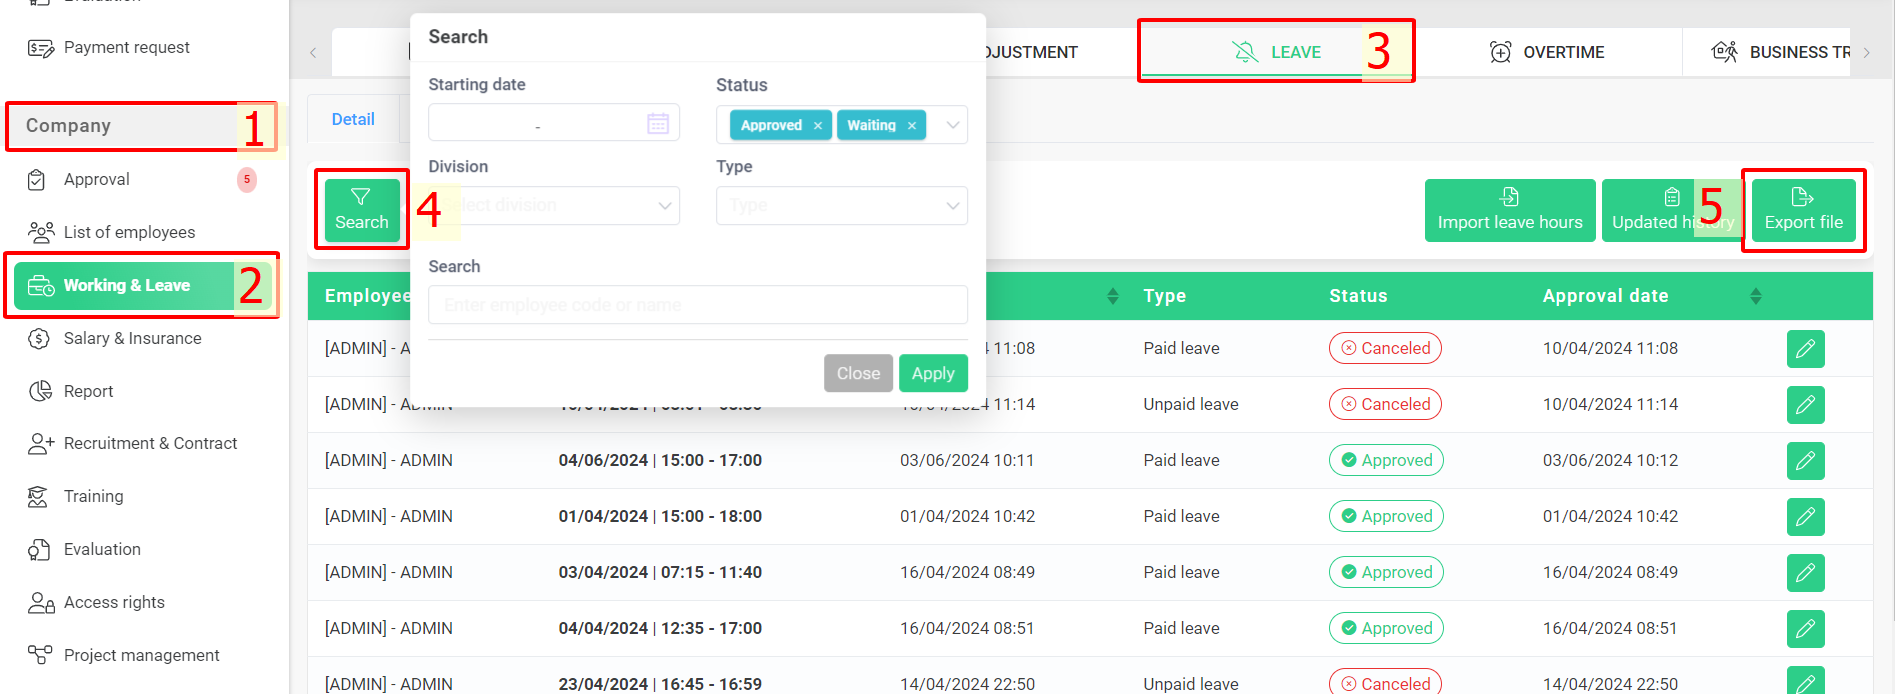
Company > Working & Leave > Leave.
The [Leave] screen displays data of specific leave applications. You can use relevant filters to set conditions for displaying applications you wish to see.
Annotation:
Glossary |
Explanation |
Time |
Requested date of the leave application |
Created |
Display the date the application was created |
Type |
Includes [Paid leave] & [Unpaid leave] |
Status |
Includes [Paid leave] & [Unpaid leave] |
Approval date |
Display the date the application was approved. |
-
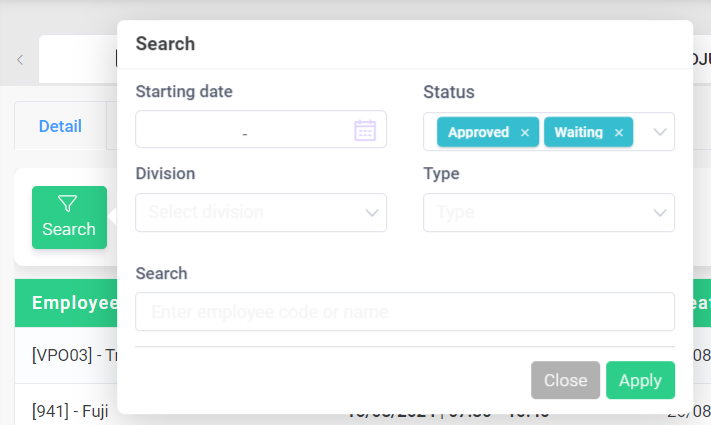
Starting date: Filtered applications by date range.
-
Status: Filtered applications by status: [Approved], [Waiting], [Reject], [Canceled], [Cancel request waiting].
-
Division: Filtered applications by division.
-
Type: Filtered applications by type: Types of leave regulated by Labour Laws.
-
Filtered applications by the employee code or name.


