[2023 Version] Add employee information
Admin or authorized account can add new employee information on the system in two ways:
1. Adding multiple employees via an Excel file (Details)
Note when filling Basic Information template file (Details)
Note when filling Salary Information template file (Details)
Note when filling Contract Information template file (Details)
Note when filling Dependent Information template file (Details)
2. Adding one employee at a time via the system menu (Details)
A. Adding multiple employees via an Excel file
To add a large number of employees to the system at once, the admin should follow these steps:
Steps:
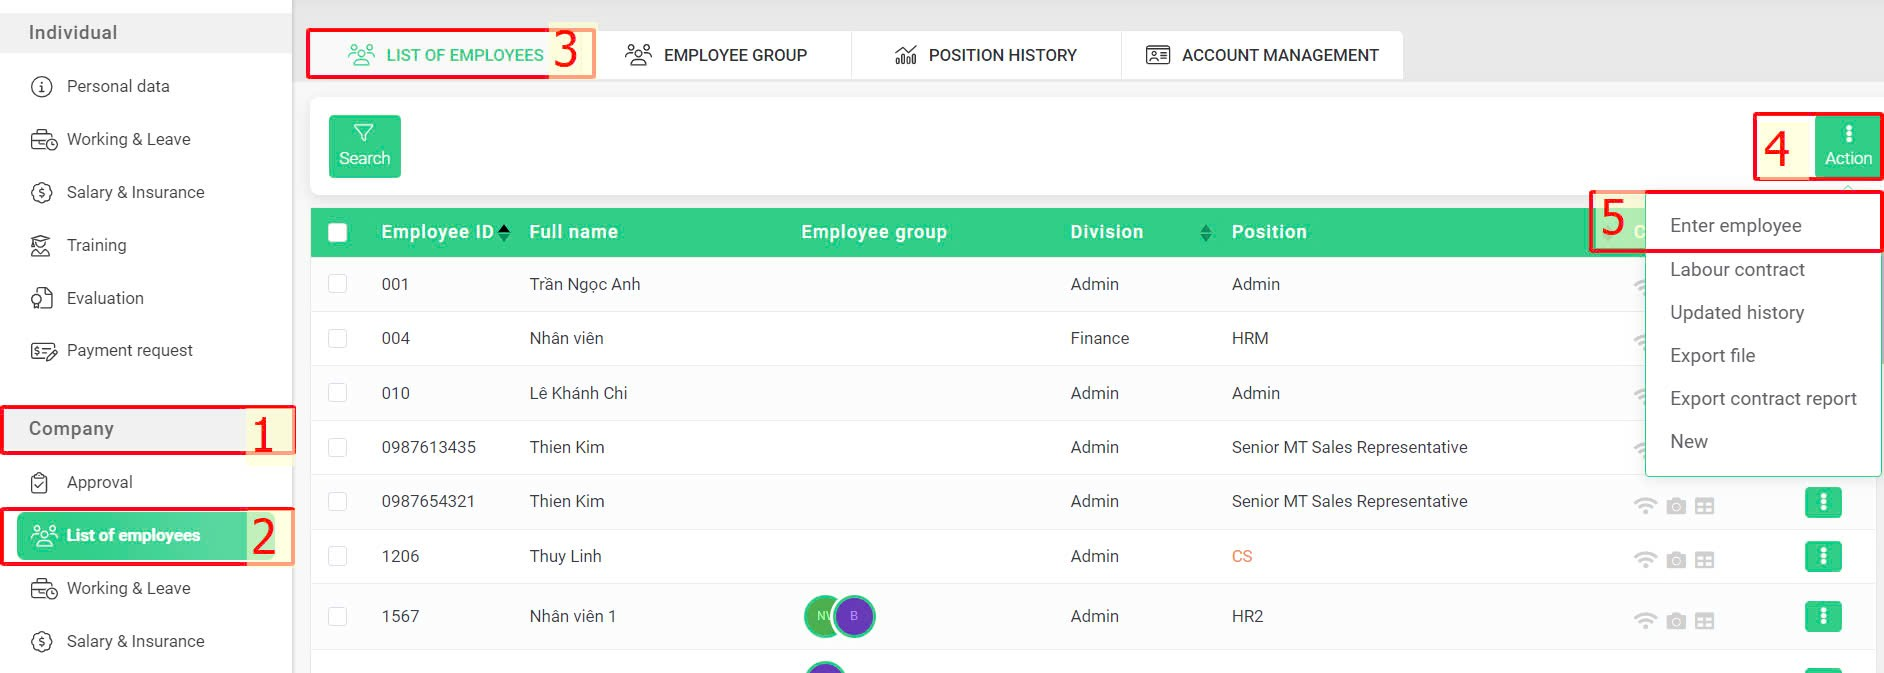
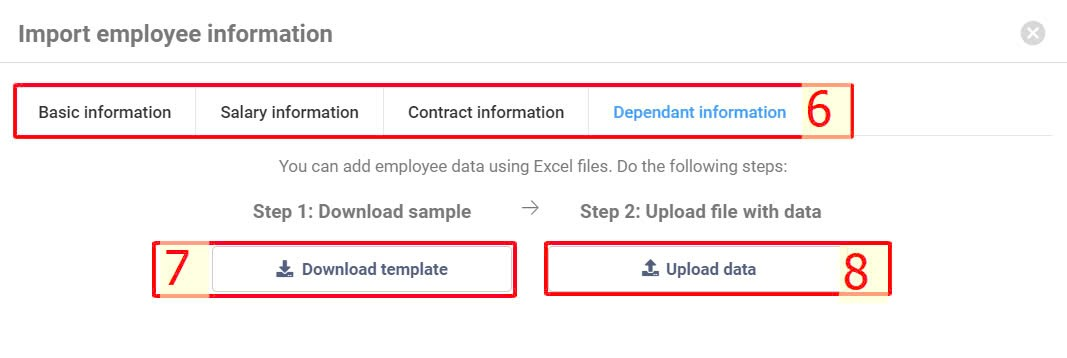
Company > List of employees > Action > Enter employee > Select the template to fill out > Download template > Fill in the information > Upload data
Note:
-
Users can choose one of the four files: Basic Information/ Salary Information/ Contract Information/ Dependent Information to enter data and upload to the system first, then add missing information later. It is not required to enter and upload information from all four files at once.
-
After uploading the file, the system will display a preview screen for the admin to review the data entered in the file along with any errors that may have occurred. The admin can directly edit on the preview screen and then click [Confirm] to upload the data to the system.
-
"Fields marked with * cannot be left blank; if there is no specific information, enter 0.
-
For data fields with a dropdown to choose from, it is mandatory to select content from the dropdown. Data entered manually or copied from other sources will not be recorded.
Downloaded sample files:
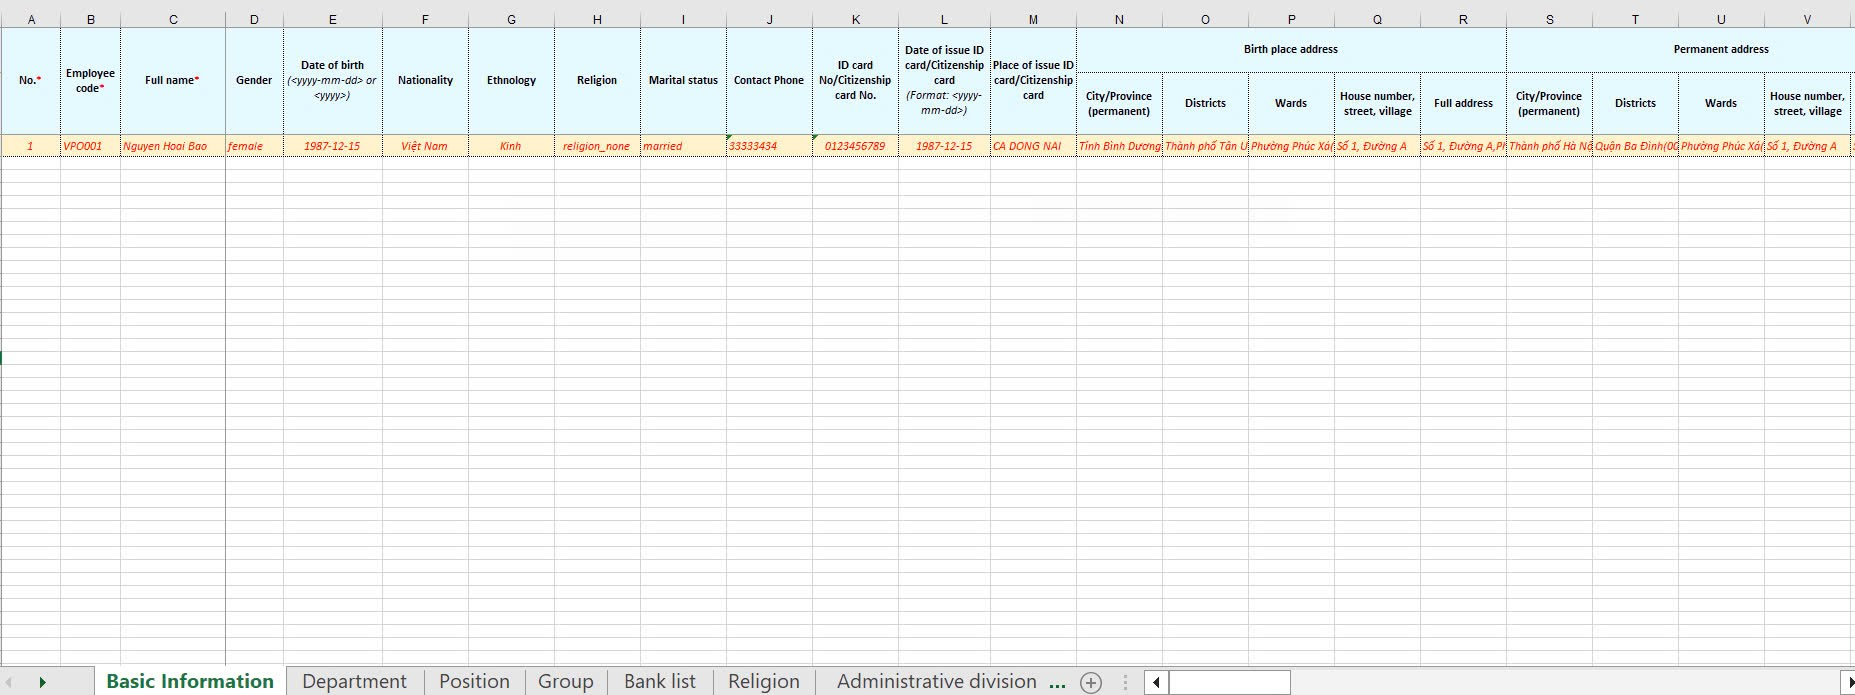
- Basic information file:
Some data fields to note:
Column |
Data field |
Note |
B |
Employee code |
You can only fill this out once, and cannot make changes after uploading the data to the system. |
AI |
Group |
Use the dropdown menu to select the groups that need more staff when entering information into the system. The dropdown will show the groups that have already been created.*Note:
|
BP |
Access group |
Always select 1 - Staff; management staff can be authorized to access data and operate neccessary features on the system. |
BQ |
Allow login |
Always choose 1 - Allow login. If the admin does not want to allow staff to log into the system yet, the admin's email can be entered in the registration email column next to it. In this case, the login information will be sent to the admin's email. When it is time to allow staff to use the system, the email can be changed back. |
BS |
User name |
The username format includes characters from a-z, numbers from 0-9, periods, and underscores, and it must NOT be written in uppercase. |
BT |
Overwrite |
- Select 0 when creating data for a new employee who has never had information in the system before- Select 1 when the employee's information is already in the system and you are exporting the file to make adjustments. |
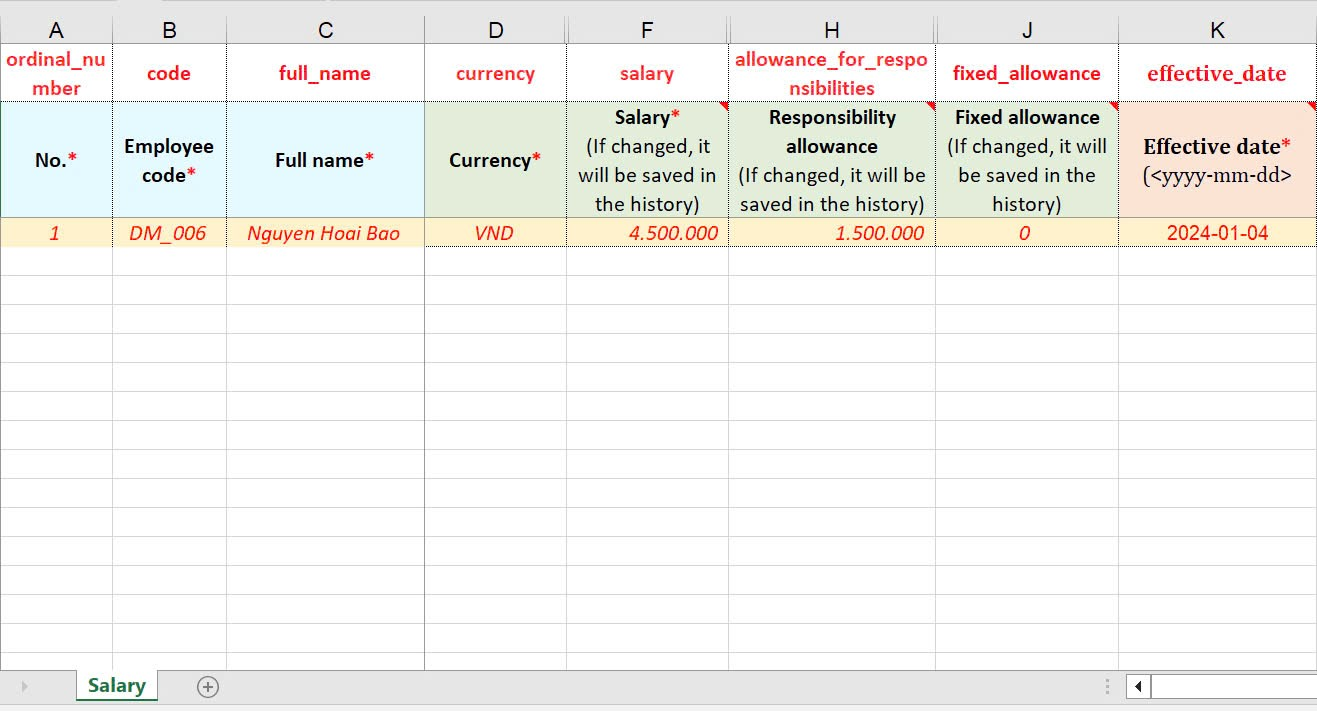
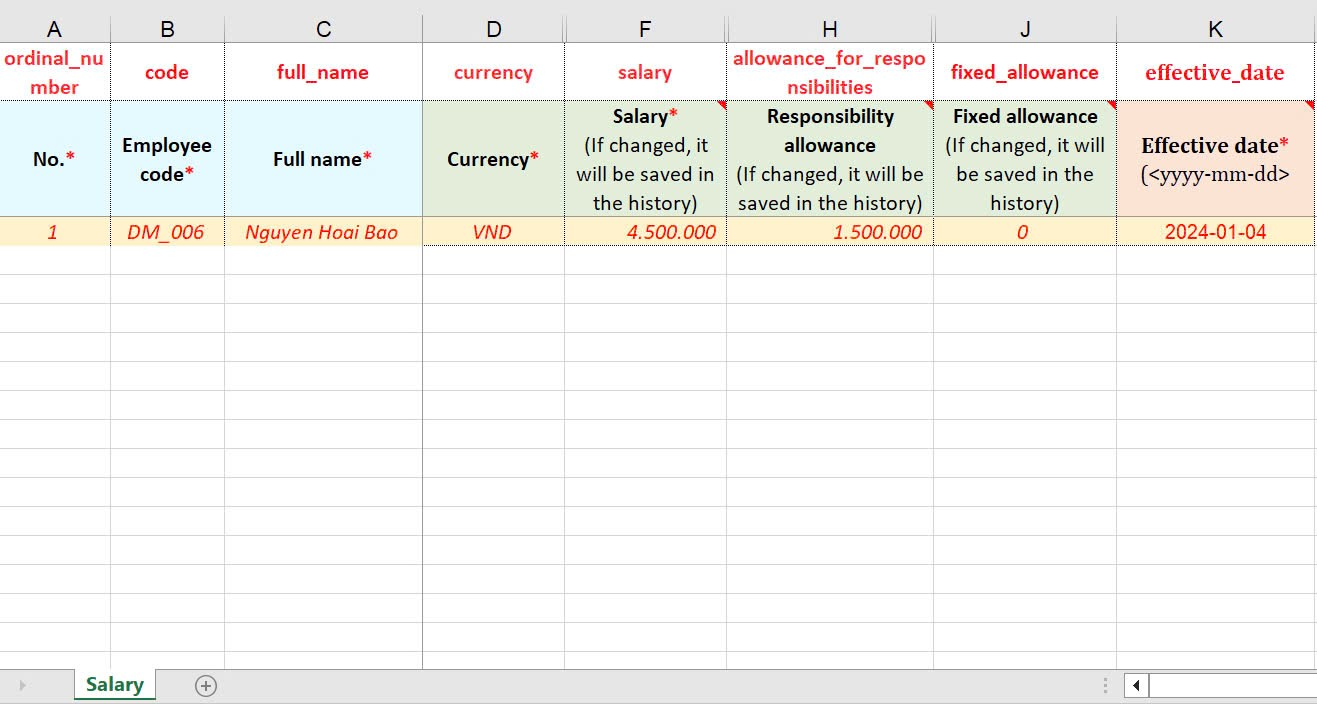
- Salary information file:
Some data fields to note:
Column |
Data field |
Note |
B |
Employee code |
You can only fill this out once, and cannot make changes after uploading the data to the system. Ensure the data is consistent across all 4 files. |
K |
Effective date |
Enter the effective date of employees' salary |
- Contract information file:
Some data fields to note:
Column |
Data field |
Note |
B |
Employee code |
You can only fill this out once, and cannot make changes after uploading the data to the system. Ensure the data is consistent across all 4 files. |
D |
Working status |
Select 1 - Working so that employee information can appear in the employee list on the system |
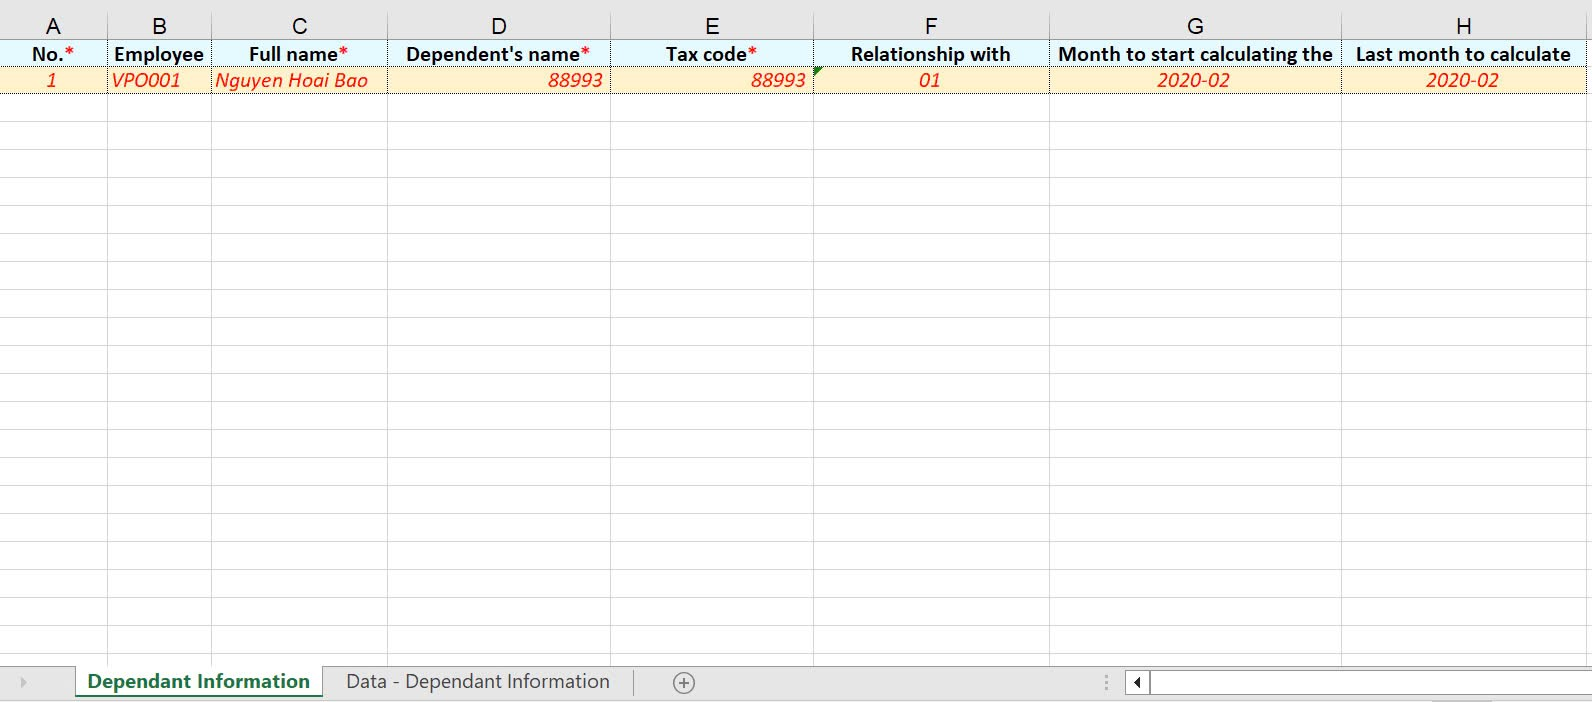
- Dependent information file:
Some data fields to note:
Column |
Data field |
Note |
B |
Employee code |
You can only fill this out once, and cannot make changes after uploading the data to the system. Ensure the data is consistent across all 4 files. |
E |
Tax code |
Enter the dependent's tax code. |
H |
Last month to calculate the deduction |
Left blank if the time has not been decided |
B. Adding one employee at a time via the system menu
If the number of employees to be created is not too large, the admin or authorized account can directly operate on the system through the following steps:
Steps:
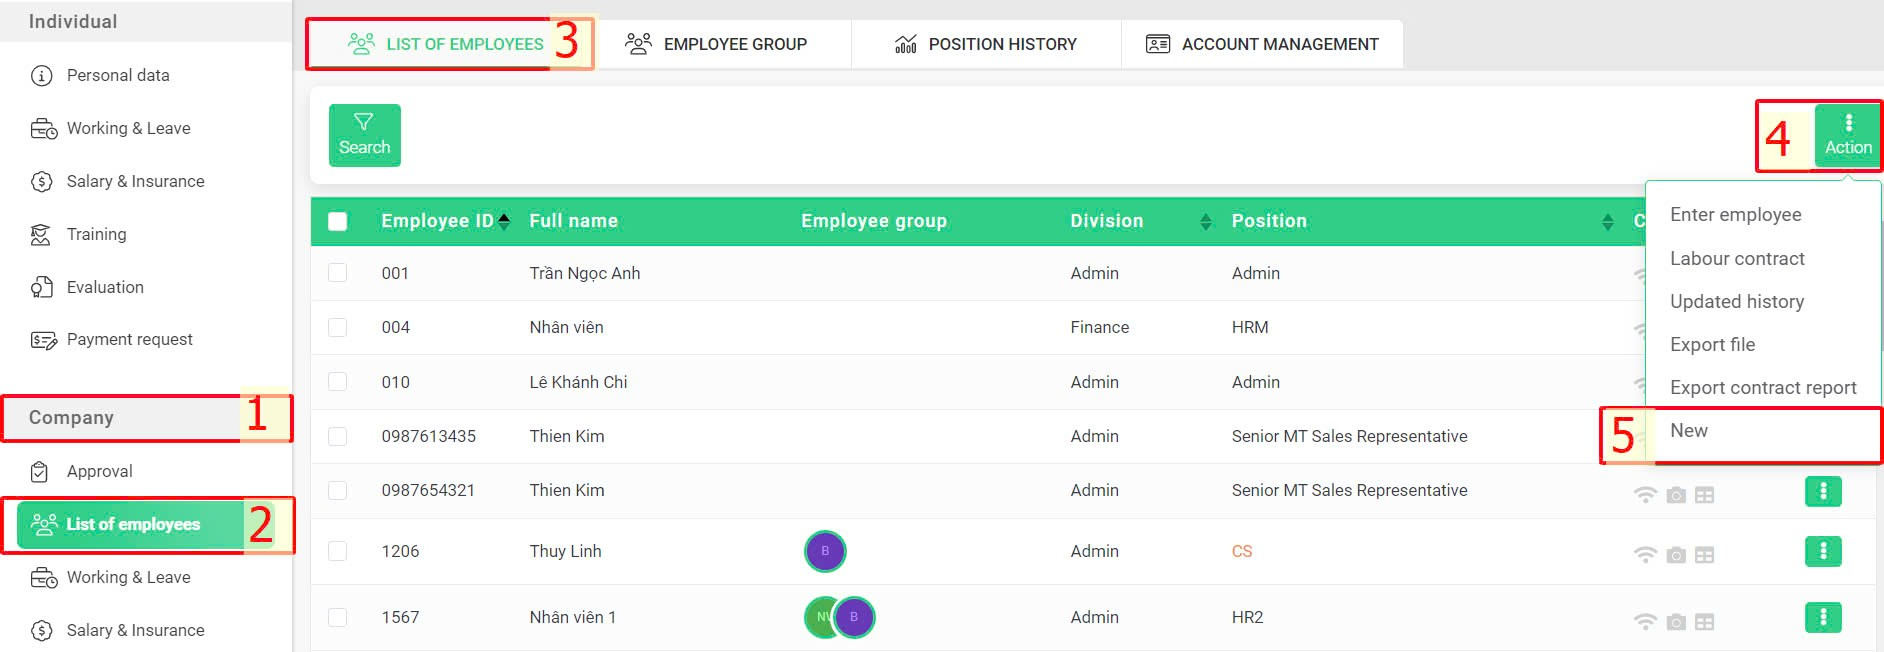
Company > List of employees > Action > New > Fill in the information > Add employee
*Notes:
-
When creating a new employee directly in the system, the admin must fill in all required fields on each screen to click [Continue] and proceed to the next screen. If the information of any mandatory fields is not available, it can be entered as 0 and adjusted later.
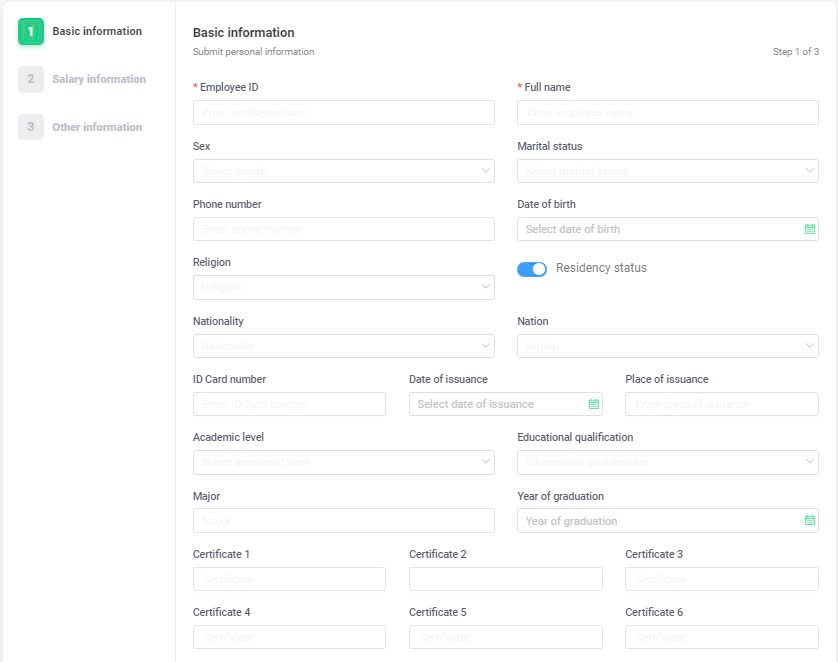
Information filling screen:
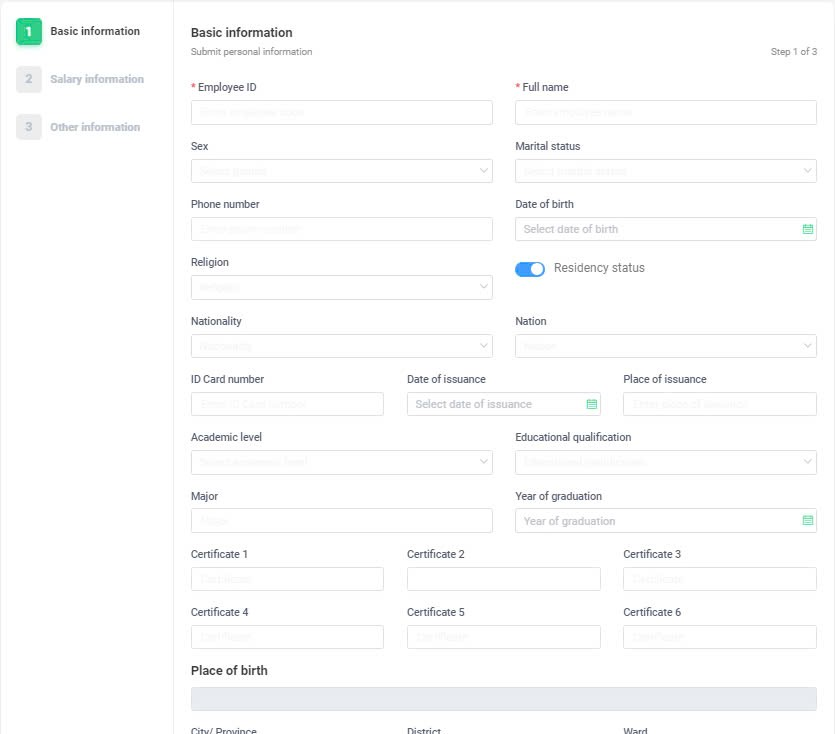
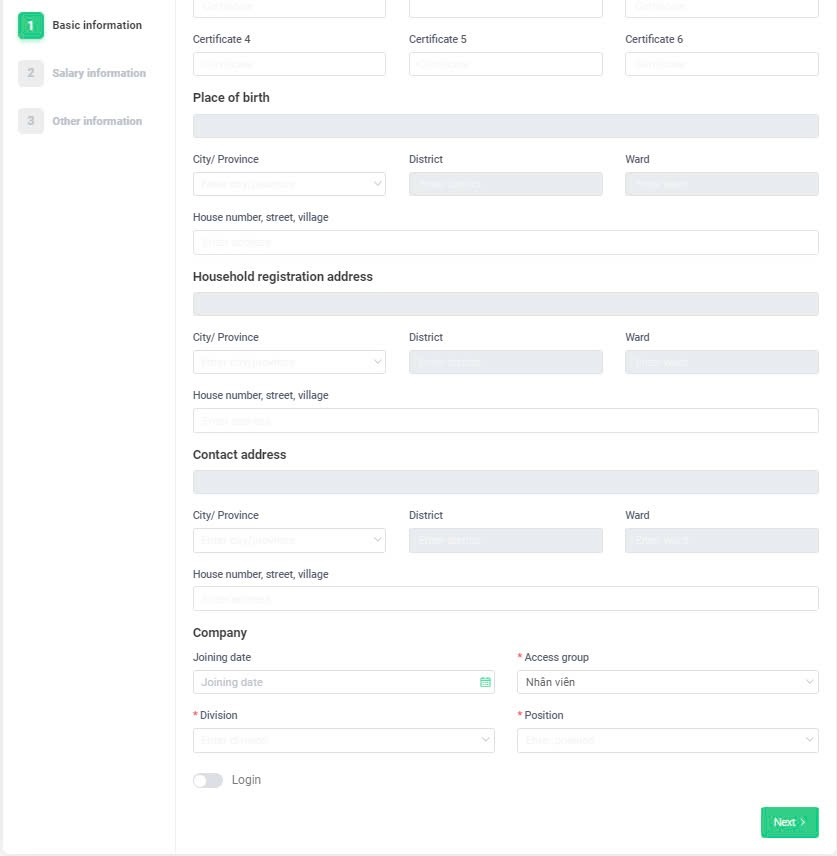
- Basic information:
Some data fields to note:
Data field |
Note |
Employee ID |
You can only fill this out once, and cannot make changes after uploading the data to the system. |
Access group |
Always select [Staff]; management staff can be authorized to access data and operate within the system. |
Login |
Toggle the switch to allow [Login]. If the admin does not want employees to log in to the system yet, they can enter the admin's email in the registration email field. In this case, the login information will be sent to the admin's email. When it is time to allow staff to use the system, the email can be changed back. |
Username |
The username format includes characters from a-z, numbers from 0-9, periods, and underscores, and it must NOT be written in uppercase. |
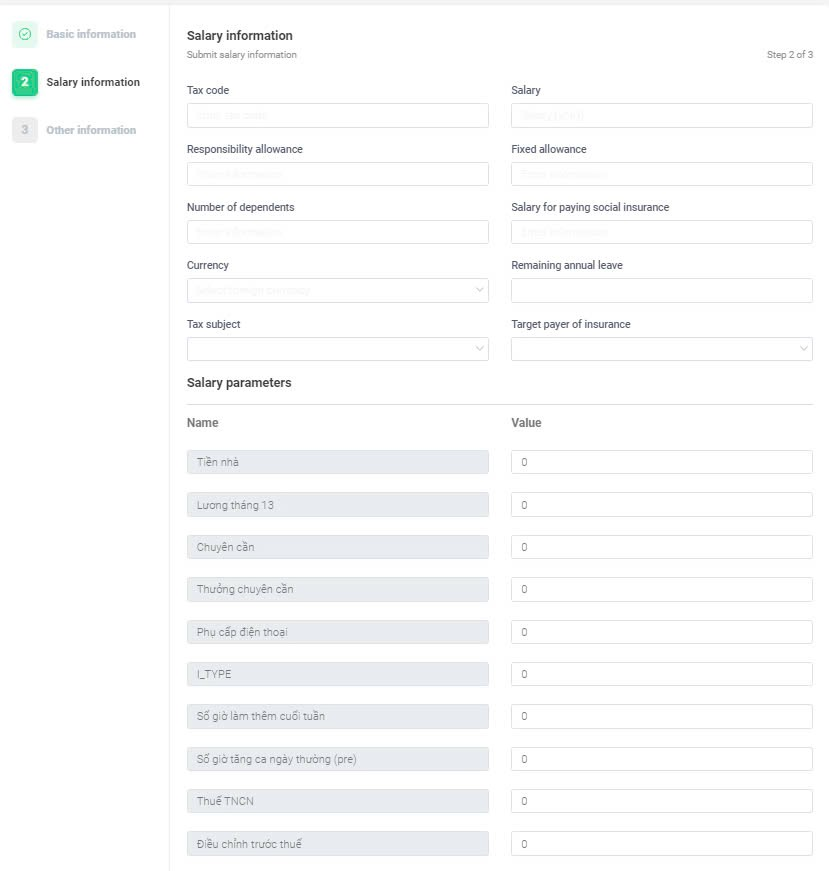
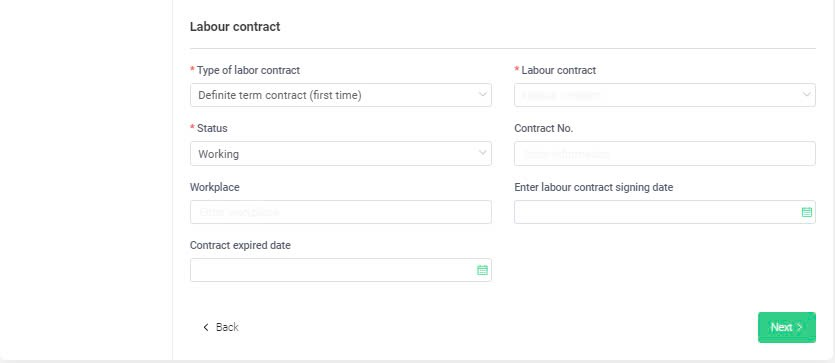
- Salary information:
Some data fields to note:
Data field |
Note |
Status |
Select 1 - Working so that employee information can appear in the employee list on the system |
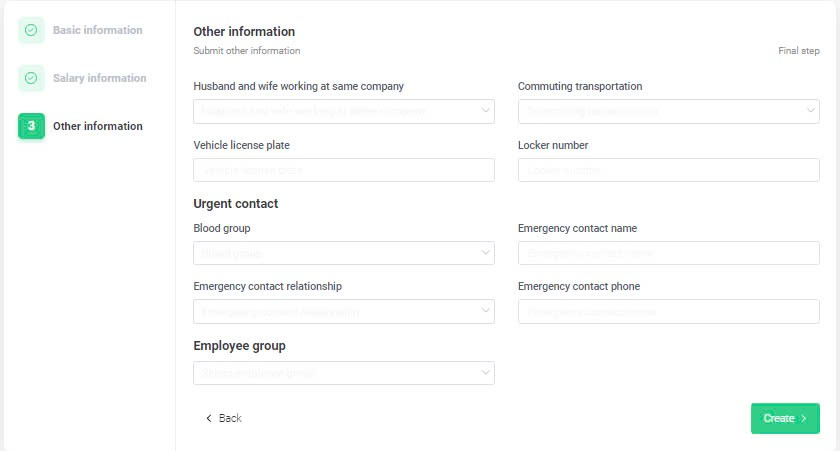
- Other information:
Data field |
Note |
Employee group |
Select the groups from the dropdown that you need to add employees after creating them. |


