

[2023 version] Create Overtime (for compensation leave) and Compensatory leave (from overtime) request
Main content
A. Create Overtime (for compensation leave) request
Regular request (Website - Mobile app)
Multi-day request (Website - Mobile app)
B. Create Compensatory leave (from overtime) request
Regular request (Website - Mobile app)
Multi-day request (Website - Mobile app)
Please contact terra team to activate this feature
The Create Overtime (for compensatory leave) Request and Compensatory Leave (from Overtime) Request features support companies that have a policy of converting overtime hours into corresponding compensatory leave for employees. After an employee submits an Overtime Request (Compensatory Leave) and the overtime hours are calculated, these hours will be added to the Compensatory Leave (from Overtime) balance, allowing the employee to submit a leave request as needed.
The steps to create the requests are as follows:
ON WEBSITE
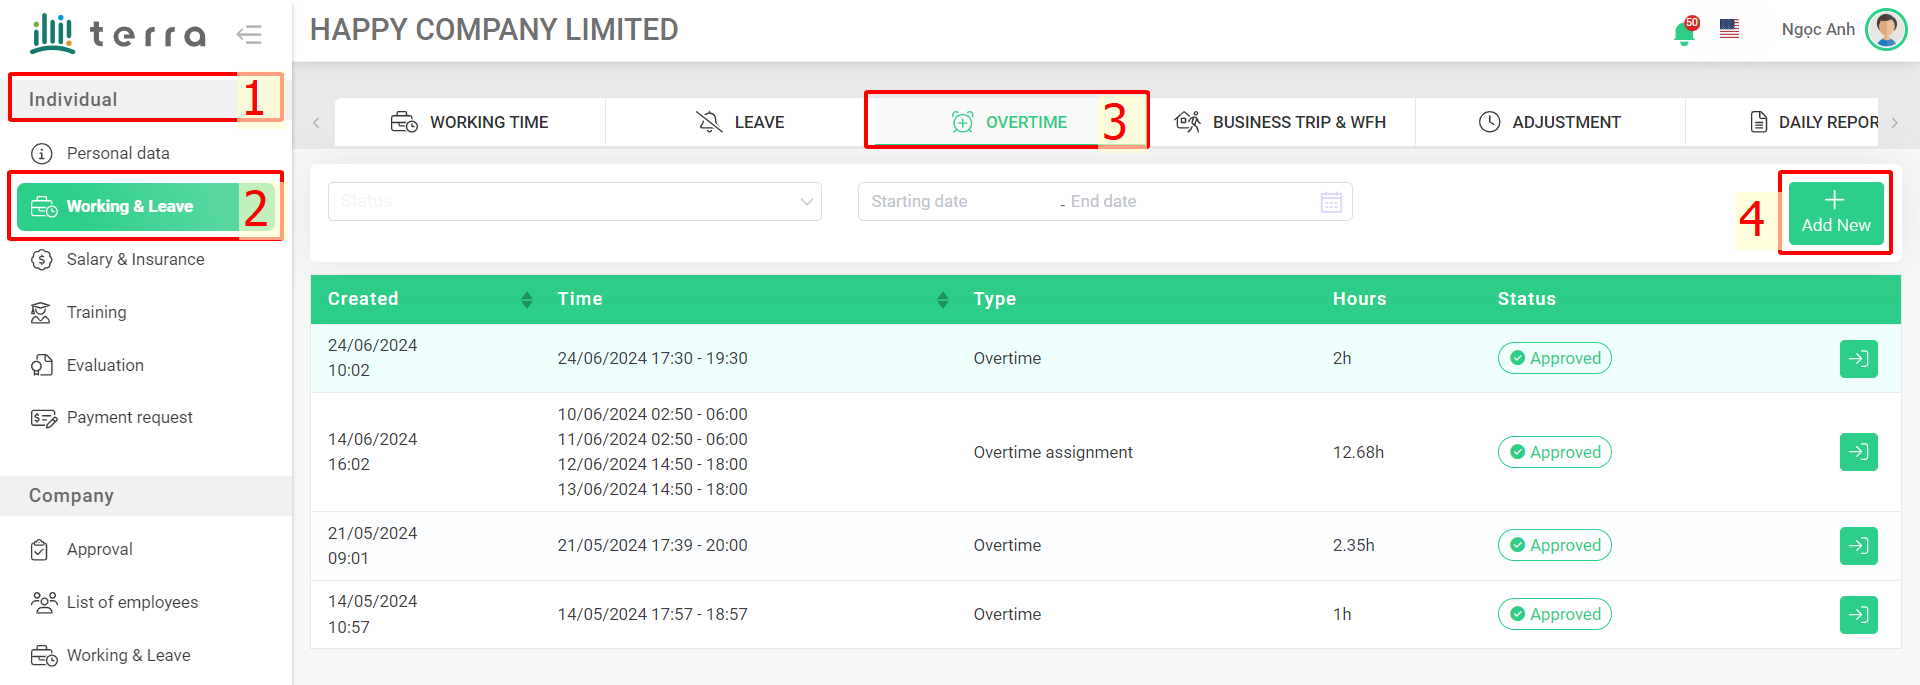
A. Create Overtime (for compensation leave) request
1. How to create a regular application
Steps:
Individual > Working & Leave > Overtime > Add New > Choose Overtime (for compensatory leave) for Request type > Insert data > Select an approver > Save.
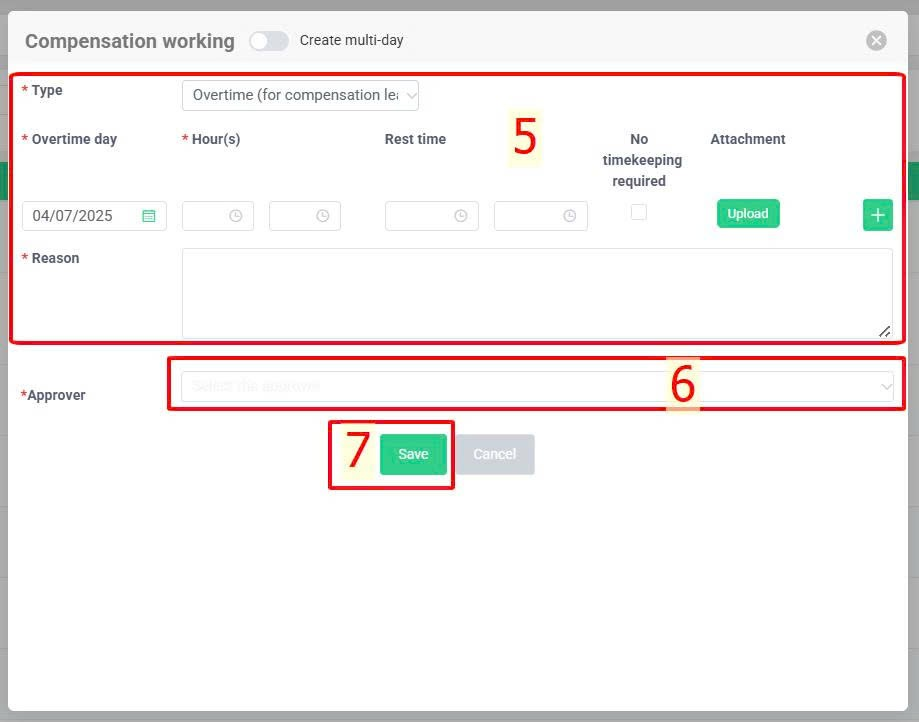
Annotation:
Glossary |
Explanation |
Type |
Choose Overtime (for compensation leave) |
|
|
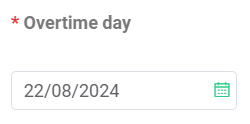
Select the day you want to work overtime. |
|
|
|
|
|
If the end time of an overtime is earlier than the start time, the system will automatically assign it to the following day and indicate "+1" to denote an overnight overtime. |
|
|
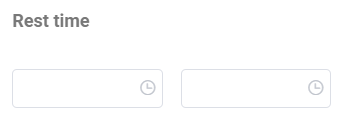
- The start/end of rest time during your overtime.- This field is not a must. It could be left empty if there is no rest time for your overtime. |
|
|
If employees select this option, they do not need to check in or out. The system will automatically record their overtime based on the hours specified in their application. |
|
|
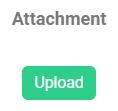
Attach relevant documents if necessary (even if the application is approved) |
|
|
Create several days in one application |


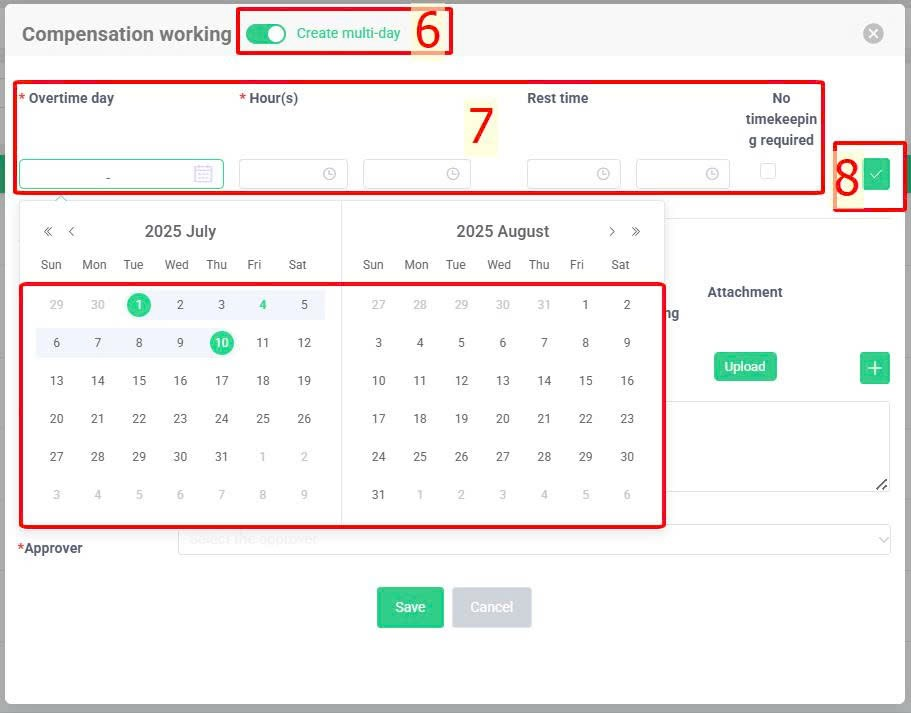
2. How to create a multi-day application
Steps:
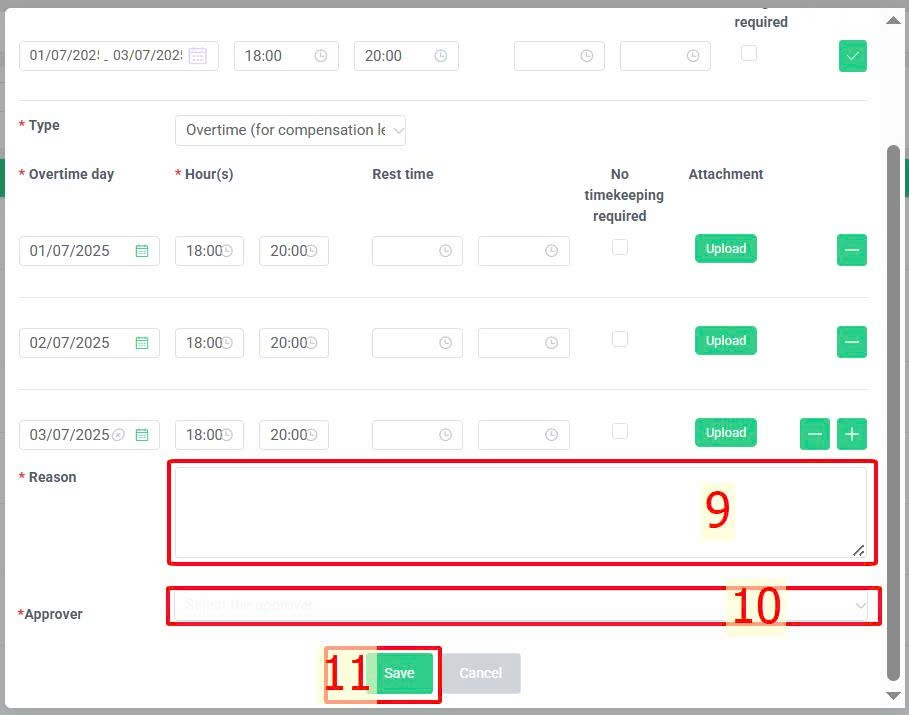
Individual > Working & Leave > Overtime > Add New > Choose Overtime (for compensatory leave) for Request type > Create multi-day > Select consecutive days you wish for > Insert data > Select  > Adjust the detail from each application (if necessary) > Select an approver > Save.


Annotation:
Glossary |
Explanation |
Type |
Choose Overtime (for compensation leave) |
|
|
Status bar access to the "create multi-day" mode. |
|
|
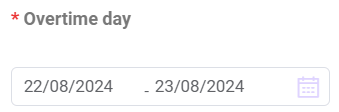
Select consecutive days you want to work overtime |
|
|
|
|
|
If the end time of an overtime is earlier than the start time, the system will automatically assign it to the following day and indicate "+1" to denote an overnight overtime. |
|
|
- The start/end of rest time during your overtime.- This field is not a must. It could be left empty if there is no rest time for your overtime. |
|
|
If employees select this option, they do not need to check in or out. The system will automatically record their overtime based on the hours specified in their application. |
|
|
Click to display the details of each overtime day according to the general setting of overtime.In case you need to change the general overtime setting, click this icon again to adjust the details of each day.Users can edit information for each day of overtime, if necessary, without requiring all days to be the same as the default general overtime setting. |
|
|
Attach relevant documents if necessary (even if the application is approved) |
|
|
Create several days in one application |


Note:
(View here)
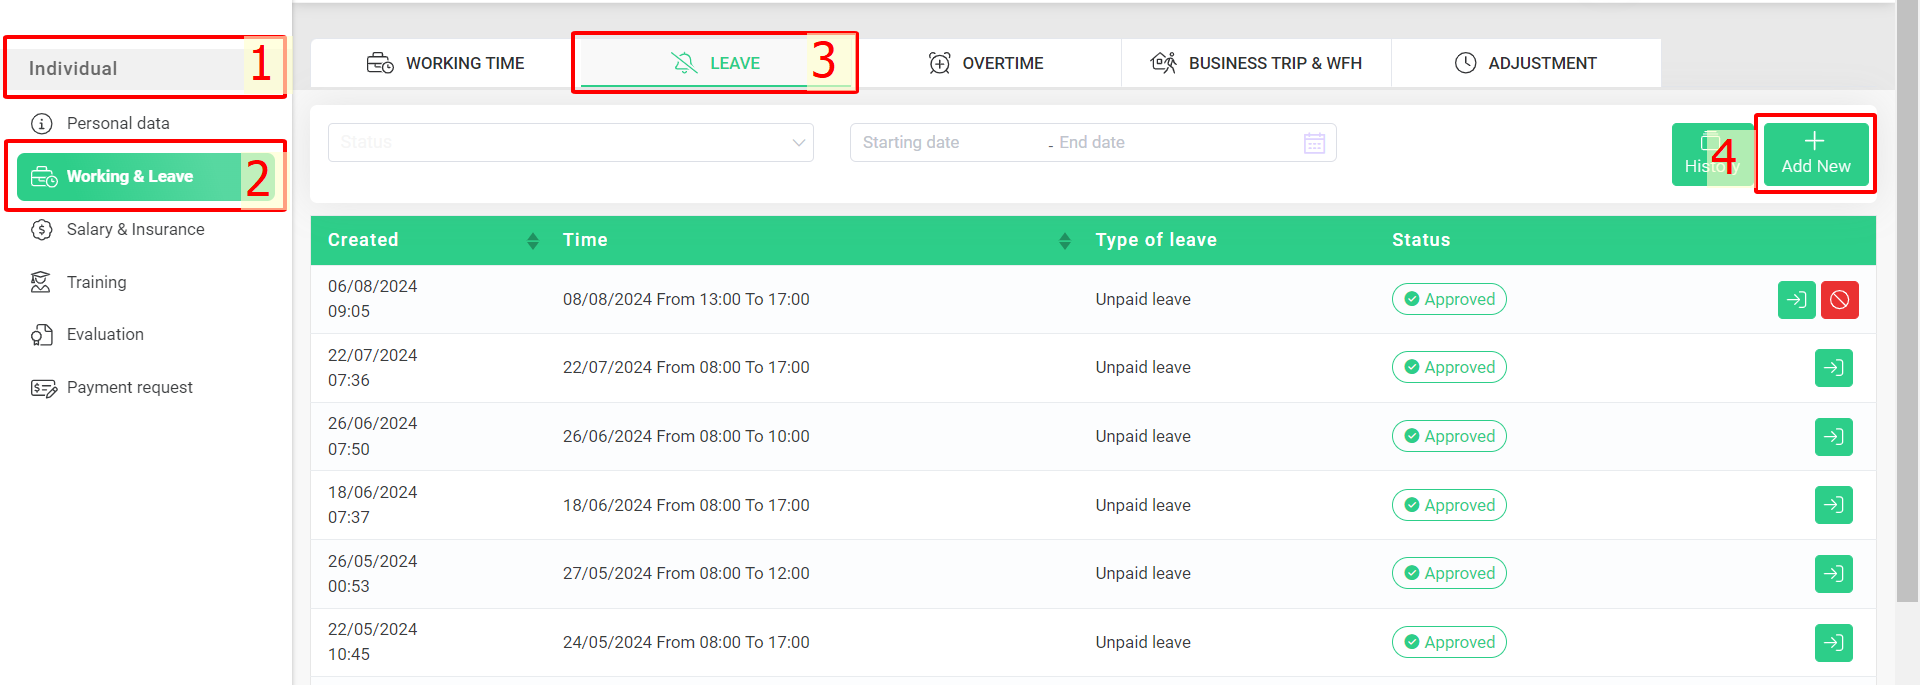
B. Create Compensatory leave (from overtime) request
1. How to create a regular request:
Steps:
Individual > Working & Leave > Leave > Add New > Choose Compensatory leave (from overtime) for request type > Insert information > Select the approver > Save.

Annotation:
Glossary |
Explanation |
Type |
Choose Compensatory leave (from overtime) |
The number of hours that can be claimed during the year |
The number of leave hours generated from over time (for compensatory leave) request that can be used |
Leave day |
Includes:- Table for selecting leave day.- Types of leave day:+ All day: Leave hours are equal to the total standard working hours in a day+ Half day leave (AM/PM): Leave hours are equal to half of the total standard working hours in a day+ By the hour: Leave hours filled in by employee |
Reason |
Fill in the reason of your leave application then send it to the approver. |
|
|
Attach relevant documents if necessary. |
|
|
Create several days in one application
|
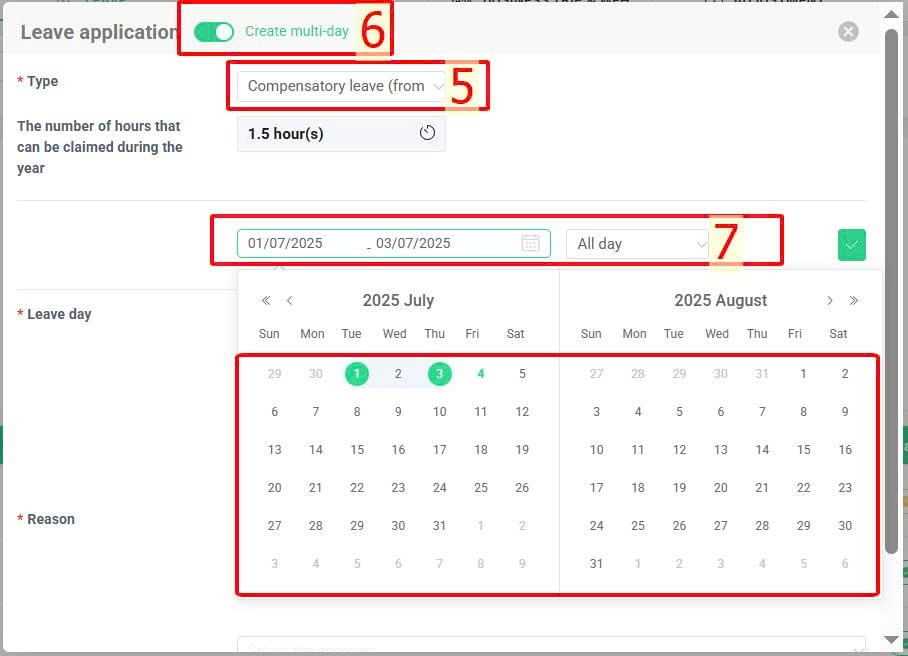
2. How to create a multi-day application
Steps:
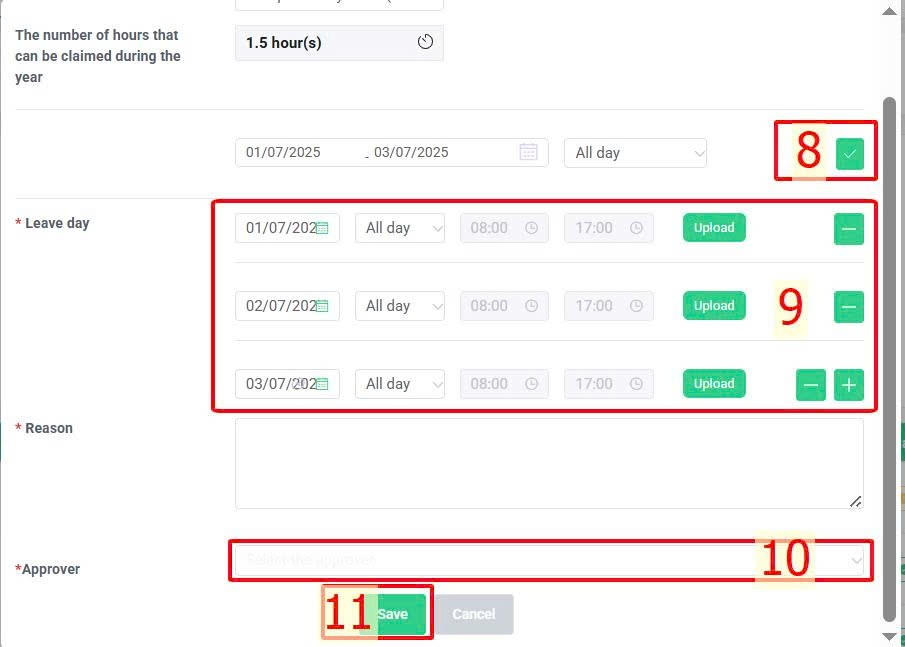
Individual > Working & Leave > Leave > Add New > Choose Compensatory leave (from overtime) for request type > Create multi-day > Select consecutive days you wish for > Select leave day's type > Select  > Fill in other information > Select the approver > Save.

Annotation:
Glossary |
Explanation |
Type |
Choose Compensatory leave (from overtime) |
|
|
Status bar accesses to the “create multi-day” mode |
The number of hours that can be claimed during the year |
The number of leave hours generated from over time (for compensatory leave) request that can be used |
Leave day |
Includes:- Table for selecting the duration of leave days.- Types of leave day:+ All day: Leave hours are equal to the total standard working hours in a day+ Half day leave (AM/PM): Leave hours are equal to half of the total standard working hours in a day+ By the hour: Leave hours filled in by employee |
|
|
Click to display the details of each leave according to the general setting.In case you need to change the general leave setting, click this icon again to adjust the details of each day. Users can edit information for each day of leave, if necessary, without requiring all days to be the same as the default general leave setting. |
Reason |
Fill in the reason of your leave application then send it to the approver. |
|
|
Attach relevant documents if necessary. |
|
|
Create several days in one application |

Note:
(View here)
ON MOBILE APP
A. Create Overtime (for compensation leave) request
1. How to create a regular application
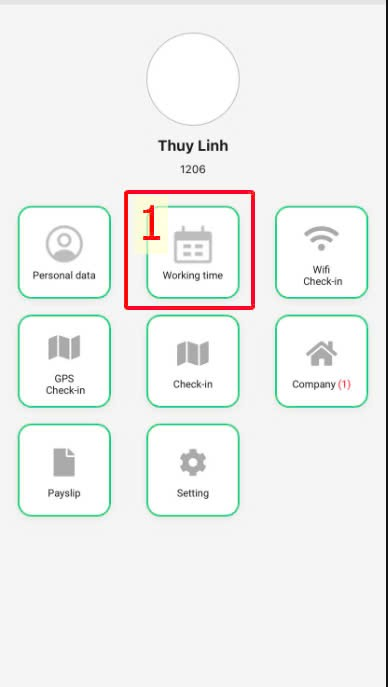
Steps: Main screen > Working time > Overtime > New > Choose Overtime (for compensation leave) > Insert information > Select an approver > Confirmation.

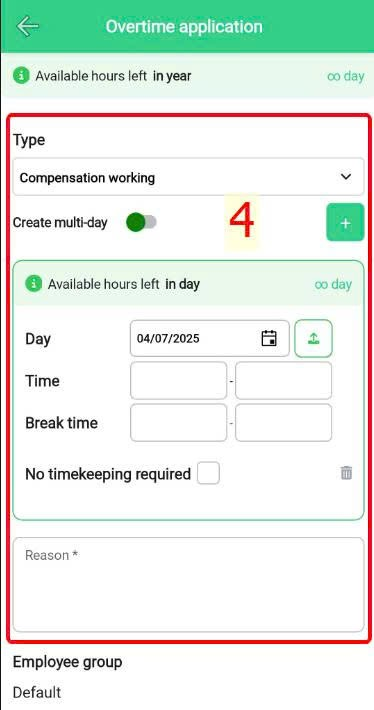
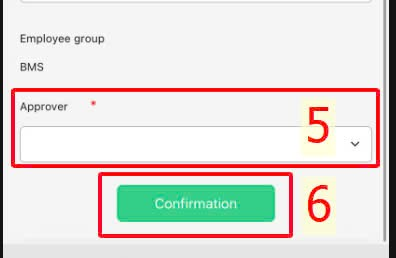
Annotation: (View here)
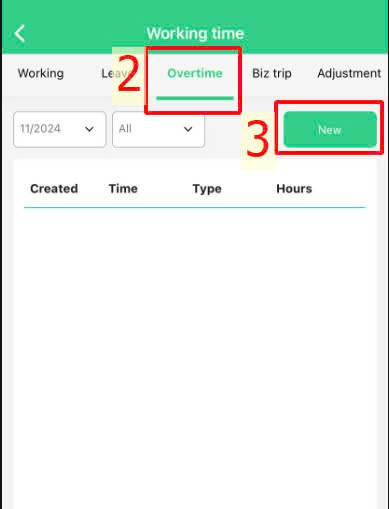
2. How to create a multi-day application
Steps:
Main screen > Working time > Overtime > New > Choose Overtime (for compensation leave) > Create multi-day > Select consecutive days you wish for > Insert data > Create several applications > Adjust the detail from each application (if necessary) > Select an approver > Save.

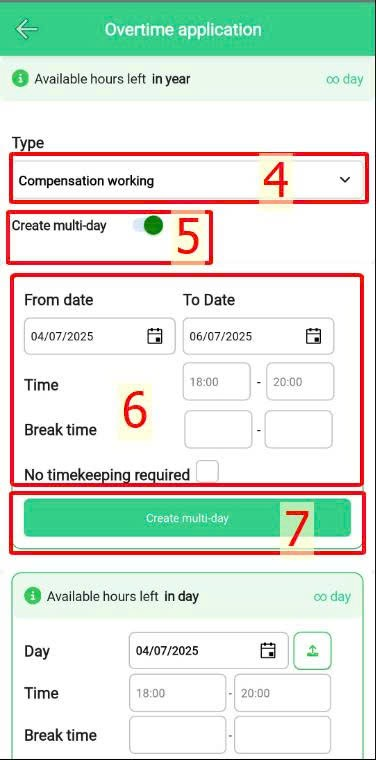


Annotation: (View here)
Note:
-
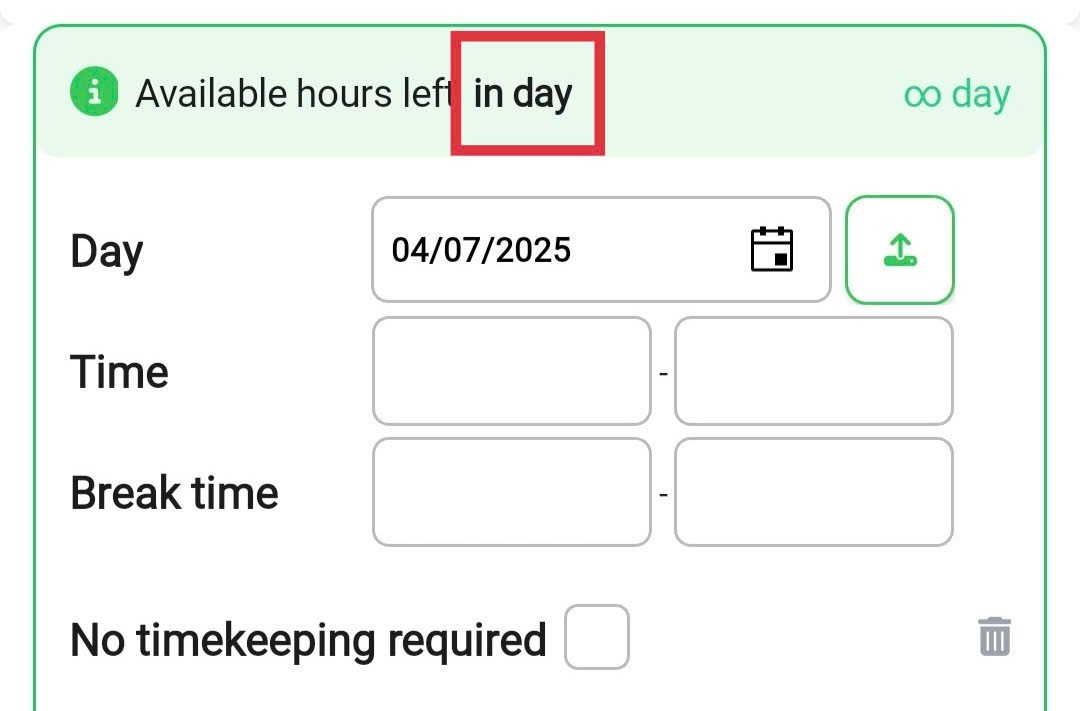
For companies that have a policy of setting hour limits for certain types of work-related requests, employees can check their remaining eligible hours by clicking on the text "per day / week / month / year."
-
The number of working hours from this type of request will be generated to compensatory leave hours.
-
View other notes here.
B. Create Compensatory leave (from overtime) request
1. How to create a regular application
Main screen > Working time > Leave > New > Choose Compensatory leave (from overtime) for request type > Fill in data > Select the approver > Confirmation.


Annotation: (View here)
2. How to create a multi-day application
Steps:
Main screen > Working time > Leave > New > Choose Compensatory leave (from overtime) for request type > Create multi-day > Select type of leave > Select date > Check multi-day > Check the details of each application precisely > Select approver > Confirmation.
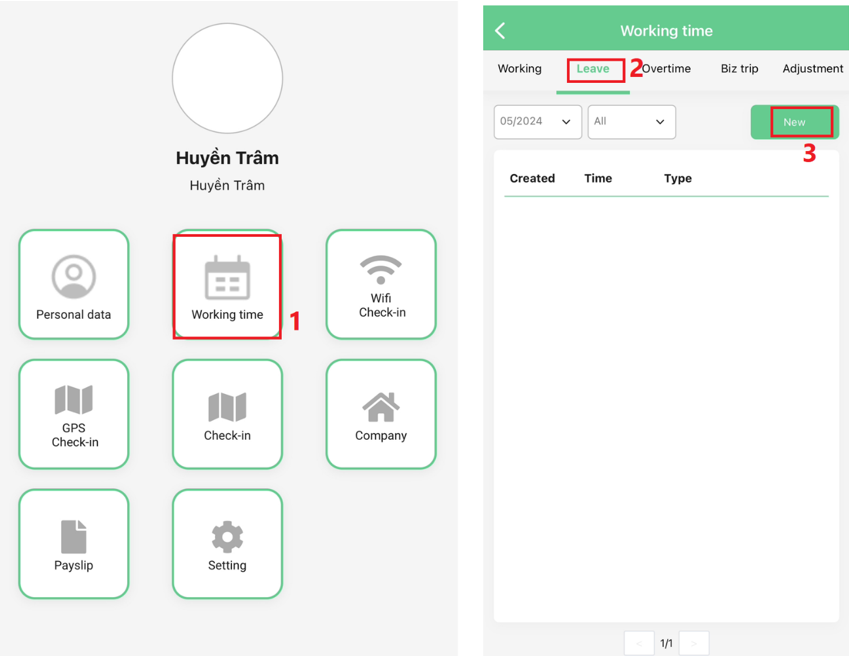
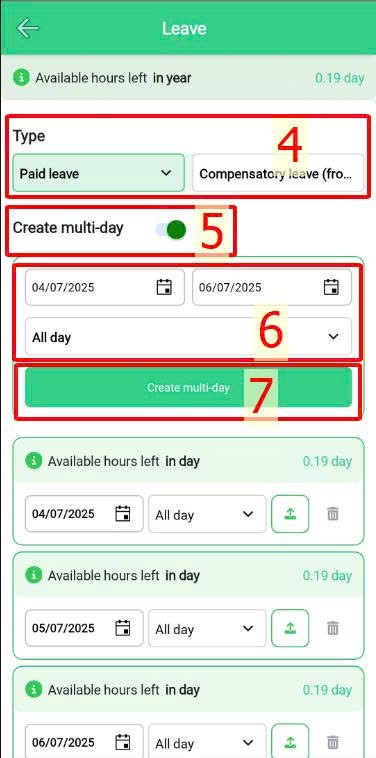
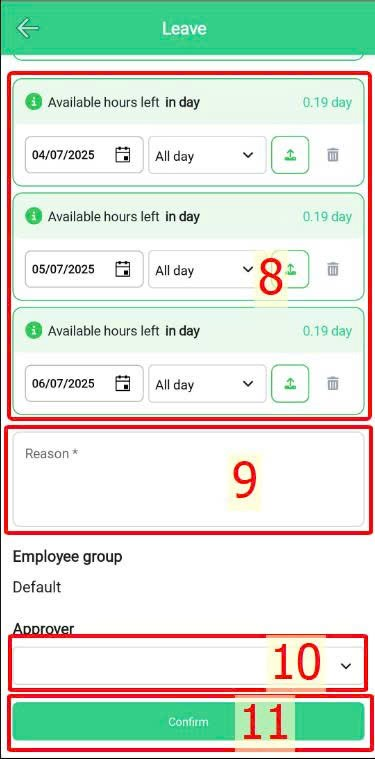
Annotation: (View here)
Note: (View here)
Notes for creating requests for employees on flexible work time
After clicking "New," before filling in the request details, the system will automatically display a dialog box for employees to select the start time of the workday for the request date.
-
In case a request is made for a past date or after checking in, the start time of the work shift should be set to the check-in time of the requested day.
-
For requests for future dates, on the day the request is submitted, employees must check in at or before the start time of the work shift selected in this dialog.
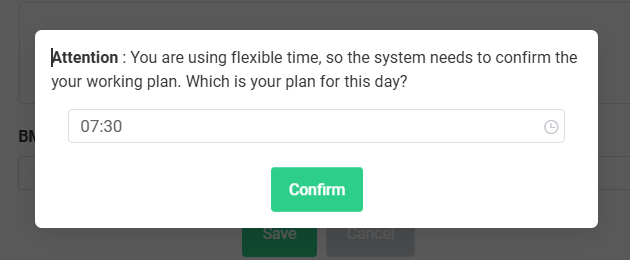
Website interface
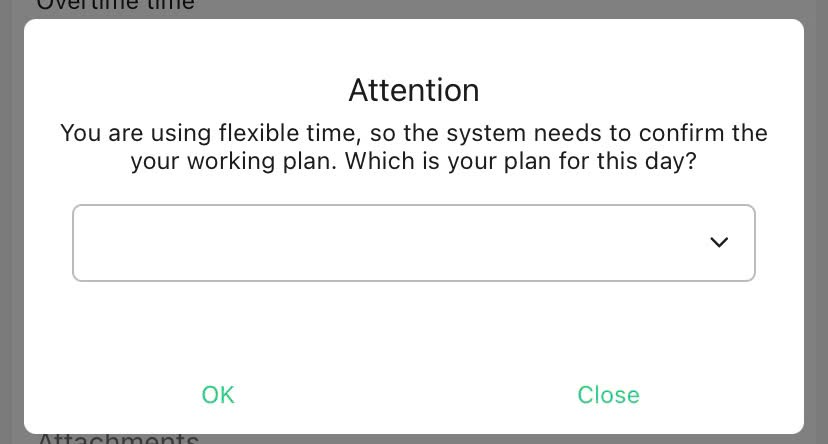
Mobile app interface
-
Note: after selecting a start time, the user's work schedule (including expected check-in and check-out times) will be fixed according to the selected time. Users are required to clock in at or before the selected time in the dialog box and clock out at or after the expected check-out time (the check-in time in the dialog box plus + standard working hours per day).
-
If no start time is selected, the system will default to the standard start time of the work schedule for calculating employee working hours.